Introduction
Ixa (Interactive eXecution of ABMs) is a Rust framework for building modular agent-based discrete event models for large-scale simulations. While its primary application is modeling disease transmission, its flexible design makes it suitable for a wide range of simulation scenarios.
Ixa is named after the Ixa crab, a genus of Indo-Pacific pebble crabs from the family Leucosiidae.
You are reading The Ixa Book, a tutorial introduction to Ixa. API documentation can be found at https://ixa.rs/doc/ixa.
This book assumes you have a basic familiarity with the command line and at least some experience with programming.
Get Started
If you are new to Rust, we suggest taking some time to learn the parts of Rust that are most useful for Ixa development. We’ve compiled some resources in rust-resources.md.
Execute the following commands to create a new Rust project called ixa_model.
cargo new --bin ixa_model

cd ixa_model
Use Ixa’s new project setup script to setup the project for Ixa.
curl -s https://raw.githubusercontent.com/CDCgov/ixa/main/scripts/setup_new_ixa_project.sh | sh -s
Open src/main.rs in your favorite editor or IDE to verify the model looks like
the following:
use ixa::run_with_args;

fn main() {
    run_with_args(|context, _, _| {
        context.add_plan(1.0, |context| {
            println!("The current time is {}", context.get_current_time());
        });
        Ok(())
    })
    .unwrap();
}
To run the model:
cargo run
# The current time is 1
To run with logging enabled globally:
cargo run -- --log-level=trace
To run with logging enabled for just ixa_model:
cargo run -- --log-level ixa_model=trace
Command Line Usage
This document contains the help content for the ixa command-line program.
ixa
Default cli arguments for Ixa runner
Usage: ixa [OPTIONS]
Options:
-
-r,–random-seed <RANDOM_SEED>— Random seedDefault value:
0 -
-c,–config— Optional path for a global properties config file -
-o,–output <OUTPUT_DIR>— Optional path for report output -
–prefix <FILE_PREFIX>— Optional prefix for report files -
-f,–force-overwrite— Overwrite existing report files? -
-l,–log-level <LOG_LEVEL>— Enable logging -
-v,–verbose— Increase logging verbosity (-v, -vv, -vvv, etc.)Level ERROR WARN INFO DEBUG TRACE Default ✓ -v ✓ ✓ ✓ -vv ✓ ✓ ✓ ✓ -vvv ✓ ✓ ✓ ✓ ✓ -
–warn— Set logging to WARN level. Shortcut for–log-level warn -
–debug— Set logging to DEBUG level. Shortcut for–log-level DEBUG -
–trace— Set logging to TRACE level. Shortcut for–log-level TRACE -
–no-stats— Suppresses the printout of summary statistics at the end of the simulation
Your First Model
In this section we will get acquainted with the basic features of Ixa by implementing a simple infectious disease transmission model. This section is just a starting point. It is not intended to be:
- An introduction to the Rust programming language (or crash course) or software engineering topics like source control with Git
- A tutorial on using a Unix-flavored command line
- An overview or survey of either disease modeling or agent-based modeling
- An exhaustive treatment of all of the features of Ixa
Our Abstract Model
We introduce modeling in Ixa by implementing a simple model for a food-borne illness where infection events follow a Poisson process. We assume that each susceptible person has a constant risk of becoming infected over time, independent of other infections.
this is not the typical sir model
While this model has susceptible, infected, and recovered disease states, it is different from the canonical “SIR” model. In this model, the risk of infection does not depend on the prevalence of infected persons. Put another way, the people in the model can become infected but they are not infectious.
In this model, each individual susceptible person has an exponentially distributed time until they are infected. The rate of infections is referred to as the force of infection, and the mean time to infection for each individual is the inverse of the force of infection. (It follows that the time between successive infection events is also exponentially distributed.)
Infected individuals subsequently recover and cannot be re-infected. The times to recovery are exponentially distributed.
High-level view of how Ixa functions
This diagram gives a high-level view of how Ixa works:

Don’t expect to understand everything in this diagram straight away. The major concepts we need to understand about models in Ixa are:
Context: AContextkeeps track of the state of the world for our model and is the primary way code interacts with anything in the running model.- Timeline: A future event list of the simulation, the timeline is a queue
of
Callbackobjects, called plans, that will assume control of theContextat a future point in time and execute the logic in the plan. - Plan: A piece of logic scheduled to execute at a certain time on the
timeline. Plans are added to the timeline through the
Context. - Entities: Generally people in a disease model, the entities in the model dynamically interact over the course of the simulation. Data can be associated with entities as properties.
- Property: Data attached to an entity. In our case, we have people properties.
- Module: An organizational unit of functionality. Simulations are
constructed out of a series of interacting modules that take turns
manipulating the
Contextthrough a mutable reference. Modules store data in the simulation using theDataPlugintrait that allows them to retrieve data by type. - Event: Modules can also emit events that other modules can subscribe to handle by event type. This allows modules to broadcast that specific things have occurred and have other modules take turns reacting to these occurrences. An example of an event might be a person becoming infected by a disease.
tip
The term “agent” is sometimes used as a synonym for “entity.”
The organization of a model’s implementation
A model in Ixa is a computer program written in the Rust programming language that uses the Ixa library (or “crate” in the language of Rust). A model is organized into of a set of modules that work together to provide all of the functions of the simulation. For instance, a simple disease transmission model might consist of the following modules:
- A population loader that initializes the set of people represented by the simulation.
- A transmission manager that models the process of how a susceptible person in the population becomes infected.
- An infection manager that transitions infected people through stages of disease until recovery.
- A reporting module that records data about how the disease evolves through the population to a file for later analysis.
The single responsibility principle in software engineering is a key idea behind modularity. It states that each module should have one clear purpose or responsibility. By designing each module to perform a single task (for example, loading the population data, managing the transmission of the disease, or handling infection progression), you create a system where each part is easier to understand, test, and maintain. This not only helps prevent errors but also allows us to iterate and improve each component independently.
In the context of our disease transmission model:
- The population loader is solely responsible for setting up the initial state of the simulation by importing and structuring the data about people.
- The transmission manager focuses exclusively on modeling the process by which persons get infected.
- The infection manager takes care of the progression of the disease within an infected individual until recovery.
- The reporting module handles data collection and output, ensuring that results are recorded accurately.
By organizing the model into these distinct modules, each with a single responsibility, we ensure that our simulation remains organized and manageable—even as the complexity of the model grows.
The rest of this chapter develops each of the modules of our model one-by-one.
Setting Up Your First Model
Create a new project with Cargo
Let’s setup the bare bones skeleton of our first model. First decide where your
Ixa-related code is going to live on your computer. On my computer, that’s the
Code directory in my home folder (or ~ for short). I will use my directory
structure for illustration purposes in this section. Just modify the commands
for wherever you chose to store your models.
Navigate to the directory you have chosen for your models and then use Cargoto
initialize a new Rust project called disease_model.
cd ~/Code
cargo new --bin disease_model
Cargo creates a directory named disease_model with a project skeleton for us.
Open the newly created disease_model directory in your favorite IDE, like
VSCode (free) or
RustRover.
🏠 home/
└── 🗂️ Code/
    └── 🗂️ disease_model/
        ├── 🗂️ src/
        │   └── 📄 main.rs
        ├── .gitignore
        └── 📄 Cargo.toml
source control
The .gitignore file lists all the files and directories you don’t want to
include in source control. For a Rust project you should at least have
target and Cargo.lock listed in the .gitignore. I also make a habit of
listing .vscode and .idea, the directories VS Code and JetBrains
respectively store IDE project settings.
cargo
Cargo is Rust’s package manager and build system. It is a single tool that
plays the role of the multiple different tools you would use in other
languages, such as pip and poetry in the Python ecosystem. We use Cargo to
- install tools like ripgrep (
cargo install) - initialize new projects (
cargo newandcargo init) - add new project dependencies (
cargo add serde) - update dependency versions (
cargo update) - check the project’s code for errors (
cargo check) - download and build the correct dependencies with the correct feature flags
(
cargo build) - build the project’s targets, including examples and tests (
cargo build) - generate documentation (
cargo doc) - run tests and benchmarks (
cargo test,cargo bench)
Setup Dependencies and Cargo.toml
Ixa comes with a convenience script for setting up new Ixa projects. Change
directory to disease_model/, the project root, and run this command.
curl -s https://raw.githubusercontent.com/CDCgov/ixa/main/scripts/setup_new_ixa_project.sh | sh -s
The script adds the Ixa library as a project dependency and provides you with a
minimal Ixa program in src/main.rs.
Dependencies
We will depend on a few external libraries in addition to Ixa. The cargo add
command makes this easy.
cargo add csv rand_distr serde
Cargo.toml
Cargo stores information about these dependencies in the Cargo.toml file. This
file also stores metadata about your project used when publishing your project
to Crates.io. Even though we won’t be publishing the crate to Crates.io, it’s a
good idea to get into the habit of adding at least the author(s) and a brief
description of the project.
# Cargo.toml
[package]
name = "disease_model"
description = "A basic disease model using the Ixa agent-based modeling framework"
authors = ["John Doe <jdoe@example.com>"]
version = "0.1.0"
edition = "2024"
publish = false                                                                    # Do not publish to the Crates.io registry

[dependencies]
csv = "1.3.1"
ixa = { git = "https://github.com/CDCgov/ixa", branch = "main" }
rand_distr = "0.5.1"
serde = { version = "1.0.217", features = ["derive"] }
Executing the Ixa model
We are almost ready to execute our first model. Edit src/main.rs to look like
this:
// main.rs
use ixa::run_with_args;

fn main() {
    run_with_args(|context, _, _| {
        context.add_plan(1.0, |context| {
            println!("The current time is {}", context.get_current_time());
        });
        Ok(())
    })
    .unwrap();
}
Don’t let this code intimidate you—it’s really quite simple. The first line says
we want to use symbols from the ixa library in the code that follows. In
main(), the first thing we do is call run_with_args(). The run_with_args()
function takes as an argument a closure inside which we can do additional setup
before the simulation is kicked off if necessary. The only setup we do is
schedule a plan at time 1.0. The plan is itself another closure that prints the
current simulation time.
closures
A closure is a small, self-contained block of code that can be passed around and executed later. It can capture and use variables from its surrounding environment, which makes it useful for things like callbacks, event handlers, or any situation where you want to define some logic on the fly and run it at a later time. In simple terms, a closure is like a mini anonymous function.
The run_with_args() function does the following:
-
It sets up a
Contextobject for us, parsing and applying any command line arguments and initializing subsystems accordingly. AContextkeeps track of the state of the world for our model and is the primary way code interacts with anything in the running model. -
It executes our closure, passing it a mutable reference to
contextso we can do any additional setup. -
Finally, it kicks off the simulation by executing
context.execute(). Of course, our model doesn’t actually do anything or even contain any data, socontext.execute()checks that there is no work to do and immediately returns.
If there is an error at any stage, run_with_args() will return an error
result. The Rust compiler will complain if we do not handle the returned result,
either by checking for the error or explicitly opting out of the check, which
encourages us to do the responsible thing: match result checks for the error.
We can build and run our model from the command line using Cargo:
cargo run
Enabling Logging
The model doesn’t do anything yet—it doesn’t even emit the log messages we included. We can turn those on to see what is happening inside our model during development with the following command line argument:
cargo run -- --log-level trace
This turns on messages emitted by Ixa itself, too. If you only want to see
messages emitted by disease_model, you can specify the module in addition to
the log level:
cargo run -- --log-level disease_model=trace
logging
The trace!, info!, and error! logging macros allow us to print messages
to the console, but they are much more powerful than a simple print statement.
With log messages, you can:
- Turn log messages on and off as needed.
- Enable only messages with a specified priority (for example, only warnings or higher).
- Filter messages to show only those emitted from a specific module, like the
peoplemodule we write in the next section.
See the logging documentation for more details.
command line arguments
The run_with_args() function takes care of handling any command line
arguments for us, which is why we don’t just create a Context object and
call context.execute() ourselves. There are many arguments we can pass to
our model that affect what is output and where, debugging options,
configuration input, and so forth. See the command line documentation for more
details.
In the next section we will add people to our model.
The People Module
In Ixa we organize our models into modules each of which is responsible for a single aspect of the model.
modules
In fact, the code of Ixa itself is organized into modules in just the same way models are.
Ixa is a framework for developing agent-based models. In most of our models,
the agents will represent people. So let’s create a module that is responsible
for people and their properties—the data that is attached to each person. Create
a new file in the src directory called people.rs.
Defining an Entity and Property
// people.rs

use ixa::prelude::*;
use ixa::trace;

use crate::POPULATION;

define_entity!(Person);
define_property!(
    // The type of the property
    enum InfectionStatus {
        S,
        I,
        R,
    },
    // The entity the property is associated with
    Person,
    // The property's default value for newly created `Person` entities
    default_const = InfectionStatus::S
);

/// Populates the "world" with the `POPULATION` number of people.
pub fn init(context: &mut Context) {
    trace!("Initializing people");
    for _ in 0..POPULATION {
        let _ = context.add_entity(Person).expect("failed to add person");
    }
}
We have to define the Person entity before we can associate properties with
it. The define_entity!(Person) macro invocation automatically defines the
Person type, implements the Entity trait for Person, and creates the type
alias PersonId = EntityId<Person>, which is the type we can use to represent
specific instances of our entity, a single person, in our simulation.
To each person we will associate a value of the enum (short for “enumeration”)
named InfectionStatus. An enum is a way to create a type that can be one of
several predefined values. Here, we have three values:
- S: Represents someone who is susceptible to infection.
- I: Represents someone who is currently infected.
- R: Represents someone who has recovered.
Each value in the enum corresponds to a stage in our simple model. The enum
value for a person’s InfectionStatus property will refer to an individual’s
health status in our simulation.
The module’s init() function
While not strictly enforced by Ixa, the general formula for an Ixa module is:
- “public” data types and functions
- “private” data types and functions
The init() function is how your module will insert any data into the context
and set up whatever initial conditions it requires before the simulation begins.
For our people module, the init() function just inserts people into the
Context.
// Populates the "world" with people.
pub fn init(context: &mut Context) {
   trace!("Initializing people");

   for _ in 0..100 {
      let _ = context.add_entity(Person).expect("failed to add person");
   }
}
We use Person here to represent a new entity with all default property values–
our one and only Property was defined to have a default value of
InfectionStatus::S (susceptible), so no additional information is needed.
The .expect(“failed to add person”) method call handles the case where adding
a person could fail. We could intercept that failure if we wanted, but in this
simple case we will just let the program crash with a message about the reason:
“failed to add person”.
The Context::add_entity method returns an entity ID wrapped in a Result,
which the expect method unwraps. We can use this ID if we need to refer to
this newly created person. Since we don’t need it, we assign the value to the
special “don’t care” variable _ (underscore), which just throws the value
away.
Constants
Having “magic numbers” embedded in your code, such as the constant 100 here
representing the total number of people in our model, is bad practice.
What if we want to change this value later? Will we even be able to find it in
all of our source code? Ixa has a formal mechanism for managing these kinds of
model parameters, but for now we will just define a “static constant” near the
top of src/main.rs named POPULATION and replace the literal 100 with
POPULATION:
use ixa::prelude::*;
use ixa::trace;

use crate::POPULATION;

define_entity!(Person);
define_property!(
    // The type of the property
    enum InfectionStatus {
        S,
        I,
        R,
    },
    // The entity the property is associated with
    Person,
    // The property's default value for newly created `Person` entities
    default_const = InfectionStatus::S
);

/// Populates the "world" with the `POPULATION` number of people.
pub fn init(context: &mut Context) {
    trace!("Initializing people");
    for _ in 0..POPULATION {
        let _ = context.add_entity(Person).expect("failed to add person");
    }
}
Let’s revisit src/main.rs:
// ANCHOR: header
mod incidence_report;
mod infection_manager;
mod people;
mod transmission_manager;

use ixa::{error, info, run_with_args, Context};

static POPULATION: u64 = 100;
static FORCE_OF_INFECTION: f64 = 0.1;
static INFECTION_DURATION: f64 = 10.0;
static MAX_TIME: f64 = 200.0;
// ANCHOR_END: header

fn main() {
    let result = run_with_args(|context: &mut Context, _args, _| {
        // Add a plan to shut down the simulation after `max_time`, regardless of
        // what else is happening in the model.
        context.add_plan(MAX_TIME, |context| {
            context.shutdown();
        });
        people::init(context);
        transmission_manager::init(context);
        infection_manager::init(context);
        incidence_report::init(context).expect("Failed to init incidence report");
        Ok(())
    });

    match result {
        Ok(_) => {
            info!("Simulation finished executing");
        }
        Err(e) => {
            error!("Simulation exited with error: {}", e);
        }
    }
}- Your IDE might have added the
mod people;line for you. If not, add it now. It tells the compiler that thepeoplemodule is attached to themainmodule (that is,main.rs). - We also need to declare our static constant for the total number of people.
- We need to initialize the people module.
Imports
Turning back to src/people.rs, your IDE might have been complaining to you
about not being able to find things “in this scope”—or, if you are lucky, your
IDE was smart enough to import the symbols you need at the top of the file
automatically. The issue is that the compiler needs to know where externally
defined items are coming from, so we need to have use statements at the top of
the file to import those items. Here is the complete src/people.rs file:
use ixa::prelude::*;
use ixa::trace;

use crate::POPULATION;

// ANCHOR: define_property
define_entity!(Person);
define_property!(
    // The type of the property
    enum InfectionStatus {
        S,
        I,
        R,
    },
    // The entity the property is associated with
    Person,
    // The property's default value for newly created `Person` entities
    default_const = InfectionStatus::S
);
// ANCHOR_END: define_property

// ANCHOR: init
/// Populates the "world" with the `POPULATION` number of people.
pub fn init(context: &mut Context) {
    trace!("Initializing people");
    for _ in 0..POPULATION {
        let _ = context.add_entity(Person).expect("failed to add person");
    }
}
// ANCHOR_END: init
The Transmission Manager
We call the module in charge of initiating new infections the transmission
manager. Create the file src/transmission_manager.rs and add
mod transmission_manager; to the top of src/main.rs right next to the
mod people; statement. We need to flesh out this skeleton.
// transmission_manager.rs
use ixa::Context;

fn attempt_infection(context: &mut Context) {
  // attempt an infection...
}

pub fn init(context: &mut Context) {
  trace!("Initializing transmission manager");
  // initialize the transmission manager...
}
Constants
Recall our abstract model: We assume that each susceptible person has a constant risk of becoming infected over time, independent of past infections, expressed as a force of infection.
There are at least three ways to implement this model:
- At the start of the simulation, schedule each person’s infection. This approach is possible because, in this model, everyone will eventually be infected, and all infections occur independently of one another.
- At the start of the simulation, schedule a single infection. When that infection occurs, schedule the next infection. If, for each susceptible person, the time to infection is exponentially distributed, then the time until the next infection of any susceptible person in the simulation is also exponentially distributed, with a rate equal to the force of infection times the number of susceptibles. Upon any one infection, we select the next infectee at random from the remaining susceptibles and schedule their infection.
- Schedule infection attempts, occurring at a rate equal to the force of infection times the total number of people. Upon any one infection attempt, we check if the attempted infectee is susceptible, and, if so, infect them. We then select the next attempted infectee at random from the entire population, and schedule their attempted infection. Infection attempts occur at a rate equal to the force of infection times the total number of people.
These three approaches are mathematically equivalent. Here we demonstrate the third approach because it is the simplest to implement in Ixa.
We have already dealt with constants when we defined the constant POPULATION
in main.rs. Let’s define FORCE_OF_INFECTION right next to it. We also cap
the simulation time to an arbitrarily large number, a good practice that
prevents the simulation from running forever in case we make a programming
error.
// main.rs
mod incidence_report;
mod infection_manager;
mod people;
mod transmission_manager;

use ixa::{error, info, run_with_args, Context};

static POPULATION: u64 = 100;
static FORCE_OF_INFECTION: f64 = 0.1;
static INFECTION_DURATION: f64 = 10.0;
static MAX_TIME: f64 = 200.0;

fn main() {
    let result = run_with_args(|context: &mut Context, _args, _| {
        // Add a plan to shut down the simulation after `max_time`, regardless of
        // what else is happening in the model.
        context.add_plan(MAX_TIME, |context| {
            context.shutdown();
        });
        people::init(context);
        transmission_manager::init(context);
        infection_manager::init(context);
        incidence_report::init(context).expect("Failed to init incidence report");
        Ok(())
    });

    match result {
        Ok(_) => {
            info!("Simulation finished executing");
        }
        Err(e) => {
            error!("Simulation exited with error: {}", e);
        }
    }
}
// ...the rest of the file...
Infection Attempts
We need to import these constants into transmission_manager. To define a new
random number source in Ixa, we use define_rng!. There are other symbols from
Ixa we will need for the implementation of attempt_infection(). You can have
your IDE add these imports for you as you go, or you can add them yourself now.
// transmission_manager.rs
use ixa::prelude::*;
use ixa::trace;
use rand_distr::Exp;

use crate::people::{InfectionStatus, Person};
use crate::{FORCE_OF_INFECTION, POPULATION};

define_rng!(TransmissionRng);

fn attempt_infection(context: &mut Context) {
    trace!("Attempting infection");
    let person_to_infect = context.sample_entity(TransmissionRng, Person).unwrap();
    let person_status: InfectionStatus = context.get_property(person_to_infect);

    if person_status == InfectionStatus::S {
        context.set_property(person_to_infect, InfectionStatus::I);
    }

    let current_time = context.get_current_time();
    let delay_to_next_attempt = context.sample_distr(
        TransmissionRng,
        Exp::new(FORCE_OF_INFECTION * POPULATION as f64).unwrap(),
    );
    let next_attempt_time = current_time + delay_to_next_attempt;

    context.add_plan(next_attempt_time, attempt_infection);
}

pub fn init(context: &mut Context) {
    trace!("Initializing transmission manager");
    context.add_plan(0.0, attempt_infection);
}
// ...the rest of the file...
The function attempt_infection() needs to do the following:
- Randomly sample a person from the population to attempt to infect.
- Check the sampled person’s current
InfectionStatus, changing it to infected (InfectionStatus::I) if and only if the person is currently susceptible (InfectionStatus::S). - Schedule the next infection attempt by inserting a plan into the timeline
that will run
attempt_infection()again.
use ixa::prelude::*;
use ixa::trace;
use rand_distr::Exp;

use crate::people::{InfectionStatus, Person};
use crate::{FORCE_OF_INFECTION, POPULATION};

define_rng!(TransmissionRng);

fn attempt_infection(context: &mut Context) {
    trace!("Attempting infection");
    let person_to_infect = context.sample_entity(TransmissionRng, Person).unwrap();
    let person_status: InfectionStatus = context.get_property(person_to_infect);

    if person_status == InfectionStatus::S {
        context.set_property(person_to_infect, InfectionStatus::I);
    }

    let current_time = context.get_current_time();
    let delay_to_next_attempt = context.sample_distr(
        TransmissionRng,
        Exp::new(FORCE_OF_INFECTION * POPULATION as f64).unwrap(),
    );
    let next_attempt_time = current_time + delay_to_next_attempt;

    context.add_plan(next_attempt_time, attempt_infection);
}

pub fn init(context: &mut Context) {
    trace!("Initializing transmission manager");
    context.add_plan(0.0, attempt_infection);
}
Read through this implementation and make sure you understand how it accomplishes the three tasks above. A few observations:
- The method call
context.sample_entity(TransmissionRng, Person)takes the name of a random number source and a query and returns anOption<PersonId>, which can have the value ofSome(PersonId)orNone. In this case, we usePersonand no property filters, which means we want to sample from the entire population. If we wanted to, we could pass filters with thewith!macro (e.g.,with!(Person, Region(“California”))). The population will never be empty, so the result will never beNone, and so we just callunwrap()on theSome(PersonId)value to get thePersonId. - If the sampled person is not susceptible, then the only thing this function does is schedule the next attempt at infection.
- The time at which the next attempt is scheduled is sampled randomly from the
exponential distribution according to our abstract model and using the random
number source
TransmissionRngthat we defined specifically for this purpose. - None of this code refers to the people module (except to import the types
InfectionStatusandPersonId) or the infection manager we are about to write, demonstrating the software engineering principle of modularity.
random number generators
Each module generally defines its own random number source with define_rng!,
avoiding interfering with the random number sources used elsewhere in the
simulation in order to preserve determinism. In Monte Carlo simulations,
deterministic pseudorandom number sequences are desirable because they
ensure reproducibility, improve efficiency, provide control over randomness,
enable consistent statistical testing, and reduce the likelihood of bias or
error. These qualities are critical in scientific computing, optimization
problems, and simulations that require precise and verifiable results.
The Infection Manager
The infection manager (infection_manager.rs) is responsible for the evolution
of an infected person after they have been infected. In this simple model, there
is only one thing for the infection manager to do: schedule the time an infected
person recovers. We’ve already seen how to change a person’s InfectionStatus
property and how to schedule plans on the timeline in the transmission module.
But how does the infection manager know about new infections?
Events
Modules can subscribe to events. The infection manager registers a function with Ixa that will be called in response to a change in a particular property.
// in infection_manager.rs
use ixa::prelude::*;
use rand_distr::Exp;

use crate::people::{InfectionStatus, Person, PersonId};
use crate::INFECTION_DURATION;

pub type InfectionStatusEvent = PropertyChangeEvent<Person, InfectionStatus>;

define_rng!(InfectionRng);

fn schedule_recovery(context: &mut Context, person_id: PersonId) {
    trace!("Scheduling recovery");
    let sampled_infection_duration =
        context.sample_distr(InfectionRng, Exp::new(1.0 / INFECTION_DURATION).unwrap());

    schedule_relative!(
        context,
        sampled_infection_duration,
        |context: &mut Context| context.set_property(person_id, InfectionStatus::R)
    );
}

fn handle_infection_status_change(context: &mut Context, event: InfectionStatusEvent) {
    trace!(
        "Handling infection status change from {:?} to {:?} for {:?}",
        event.previous,
        event.current,
        event.entity_id
    );
    if event.current == InfectionStatus::I {
        schedule_recovery(context, event.entity_id);
    }
}

pub fn init(context: &mut Context) {
    trace!("Initializing infection_manager");
    context.subscribe_to_event::<InfectionStatusEvent>(handle_infection_status_change);
}
This line isn’t defining a new struct or even a new type. Rather, it defines an
alias for PropertyChangeEvent<E: Entity, P: Property<E>> with the generic
types instantiated for the property we want to monitor, InfectionStatus. This
is effectively the name of the event we subscribe to in the module’s init()
function:
// in infection_manager.rs
use ixa::prelude::*;
use rand_distr::Exp;

use crate::people::{InfectionStatus, Person, PersonId};
use crate::INFECTION_DURATION;

pub type InfectionStatusEvent = PropertyChangeEvent<Person, InfectionStatus>;

define_rng!(InfectionRng);

fn schedule_recovery(context: &mut Context, person_id: PersonId) {
    trace!("Scheduling recovery");
    let sampled_infection_duration =
        context.sample_distr(InfectionRng, Exp::new(1.0 / INFECTION_DURATION).unwrap());

    schedule_relative!(
        context,
        sampled_infection_duration,
        |context: &mut Context| context.set_property(person_id, InfectionStatus::R)
    );
}

fn handle_infection_status_change(context: &mut Context, event: InfectionStatusEvent) {
    trace!(
        "Handling infection status change from {:?} to {:?} for {:?}",
        event.previous,
        event.current,
        event.entity_id
    );
    if event.current == InfectionStatus::I {
        schedule_recovery(context, event.entity_id);
    }
}

pub fn init(context: &mut Context) {
    trace!("Initializing infection_manager");
    context.subscribe_to_event::<InfectionStatusEvent>(handle_infection_status_change);
}
The event handler is just a regular Rust function that takes a Context and an
InfectionStatusEvent, the latter of which holds the PersonId of the person
whose InfectionStatus changed, the current InfectionStatus value, and the
previous InfectionStatus value.
// in infection_manager.rs
use ixa::prelude::*;
use rand_distr::Exp;

use crate::people::{InfectionStatus, Person, PersonId};
use crate::INFECTION_DURATION;

pub type InfectionStatusEvent = PropertyChangeEvent<Person, InfectionStatus>;

define_rng!(InfectionRng);

fn schedule_recovery(context: &mut Context, person_id: PersonId) {
    trace!("Scheduling recovery");
    let sampled_infection_duration =
        context.sample_distr(InfectionRng, Exp::new(1.0 / INFECTION_DURATION).unwrap());

    schedule_relative!(
        context,
        sampled_infection_duration,
        |context: &mut Context| context.set_property(person_id, InfectionStatus::R)
    );
}

fn handle_infection_status_change(context: &mut Context, event: InfectionStatusEvent) {
    trace!(
        "Handling infection status change from {:?} to {:?} for {:?}",
        event.previous,
        event.current,
        event.entity_id
    );
    if event.current == InfectionStatus::I {
        schedule_recovery(context, event.entity_id);
    }
}

pub fn init(context: &mut Context) {
    trace!("Initializing infection_manager");
    context.subscribe_to_event::<InfectionStatusEvent>(handle_infection_status_change);
}
We only care about new infections in this model.
Scheduling Recovery
As in attempt_infection(), we sample the recovery time from the exponential
distribution with mean INFECTION_DURATION, a constant we define in main.rs.
We define a random number source for this module’s exclusive use with
define_rng!(InfectionRng) as we did before.
use ixa::prelude::*;
use rand_distr::Exp;

use crate::people::{InfectionStatus, Person, PersonId};
use crate::INFECTION_DURATION;

pub type InfectionStatusEvent = PropertyChangeEvent<Person, InfectionStatus>;

define_rng!(InfectionRng);

fn schedule_recovery(context: &mut Context, person_id: PersonId) {
    trace!("Scheduling recovery");
    let sampled_infection_duration =
        context.sample_distr(InfectionRng, Exp::new(1.0 / INFECTION_DURATION).unwrap());

    schedule_relative!(
        context,
        sampled_infection_duration,
        |context: &mut Context| context.set_property(person_id, InfectionStatus::R)
    );
}

fn handle_infection_status_change(context: &mut Context, event: InfectionStatusEvent) {
    trace!(
        "Handling infection status change from {:?} to {:?} for {:?}",
        event.previous,
        event.current,
        event.entity_id
    );
    if event.current == InfectionStatus::I {
        schedule_recovery(context, event.entity_id);
    }
}

pub fn init(context: &mut Context) {
    trace!("Initializing infection_manager");
    context.subscribe_to_event::<InfectionStatusEvent>(handle_infection_status_change);
}
Notice that the plan is again just a Rust function, but this time it takes the form of a closure rather than a traditionally defined function. This is convenient when the function is only a line or two.
closures and captured variables
The move keyword in the syntax for Rust closures instructs the closure to
take ownership of any variables it uses from its surrounding context—these are
known as captured variables. Normally, when a closure refers to variables
defined outside of its own body, it borrows them, which means it uses
references to those values. However, with move, the closure takes full
ownership by moving the variables into its own scope. This is especially
useful when the closure must outlive the current scope or be passed to another
thread, as it ensures that the closure has its own independent copy of the
data without relying on references that might become invalid.
The Incidence Reporter
An agent-based model does not output an answer at the end of a simulation in the usual sense. Rather, the simulation evolves the state of the world over time. If we want to track that evolution for later analysis, it is up to us to collect the data we want to have. The built-in report feature makes it easy to record data to a CSV file during the simulation.
Our model will only have a single report that records the current in-simulation
time, the PersonId, and the InfectionStatus of a person whenever their
InfectionStatus changes. We define a struct representing a single row of data.
// in incidence_report.rs
use std::path::PathBuf;

use ixa::prelude::*;
use ixa::trace;
use serde::Serialize;

use crate::infection_manager::InfectionStatusEvent;
use crate::people::{InfectionStatus, PersonId};

#[derive(Serialize, Clone)]
struct IncidenceReportItem {
    time: f64,
    person_id: PersonId,
    infection_status: InfectionStatus,
}

define_report!(IncidenceReportItem);

fn handle_infection_status_change(context: &mut Context, event: InfectionStatusEvent) {
    trace!(
        "Recording infection status change from {:?} to {:?} for {:?}",
        event.previous, event.current, event.entity_id
    );
    context.send_report(IncidenceReportItem {
        time: context.get_current_time(),
        person_id: event.entity_id,
        infection_status: event.current,
    });
}

pub fn init(context: &mut Context) -> Result<(), IxaError> {
    trace!("Initializing incidence_report");

    // Output directory is relative to the directory with the Cargo.toml file.
    let output_path = PathBuf::from(env!("CARGO_MANIFEST_DIR"));

    // In the configuration of report options below, we set `overwrite(true)`, which is not
    // recommended for production code in order to prevent accidental data loss. It is set
    // here so that newcomers won't have to deal with a confusing error while running
    // examples.
    context
        .report_options()
        .directory(output_path)
        .overwrite(true);
    context.add_report::<IncidenceReportItem>("incidence")?;
    context.subscribe_to_event::<InfectionStatusEvent>(handle_infection_status_change);
    Ok(())
}
The fact that IncidenceReportItem derives Serialize is what makes this magic
work. We define a report for this struct using the define_report! macro.
use std::path::PathBuf;

use ixa::prelude::*;
use ixa::trace;
use serde::Serialize;

use crate::infection_manager::InfectionStatusEvent;
use crate::people::{InfectionStatus, PersonId};

#[derive(Serialize, Clone)]
struct IncidenceReportItem {
    time: f64,
    person_id: PersonId,
    infection_status: InfectionStatus,
}

define_report!(IncidenceReportItem);

fn handle_infection_status_change(context: &mut Context, event: InfectionStatusEvent) {
    trace!(
        "Recording infection status change from {:?} to {:?} for {:?}",
        event.previous, event.current, event.entity_id
    );
    context.send_report(IncidenceReportItem {
        time: context.get_current_time(),
        person_id: event.entity_id,
        infection_status: event.current,
    });
}

pub fn init(context: &mut Context) -> Result<(), IxaError> {
    trace!("Initializing incidence_report");

    // Output directory is relative to the directory with the Cargo.toml file.
    let output_path = PathBuf::from(env!("CARGO_MANIFEST_DIR"));

    // In the configuration of report options below, we set `overwrite(true)`, which is not
    // recommended for production code in order to prevent accidental data loss. It is set
    // here so that newcomers won't have to deal with a confusing error while running
    // examples.
    context
        .report_options()
        .directory(output_path)
        .overwrite(true);
    context.add_report::<IncidenceReportItem>("incidence")?;
    context.subscribe_to_event::<InfectionStatusEvent>(handle_infection_status_change);
    Ok(())
}
The way we listen to events is almost identical to how we did it in the
infection module. First let’s make the event handler, that is, the callback
that will be called whenever an event is emitted.
use std::path::PathBuf;

use ixa::prelude::*;
use ixa::trace;
use serde::Serialize;

use crate::infection_manager::InfectionStatusEvent;
use crate::people::{InfectionStatus, PersonId};

#[derive(Serialize, Clone)]
struct IncidenceReportItem {
    time: f64,
    person_id: PersonId,
    infection_status: InfectionStatus,
}

define_report!(IncidenceReportItem);

fn handle_infection_status_change(context: &mut Context, event: InfectionStatusEvent) {
    trace!(
        "Recording infection status change from {:?} to {:?} for {:?}",
        event.previous, event.current, event.entity_id
    );
    context.send_report(IncidenceReportItem {
        time: context.get_current_time(),
        person_id: event.entity_id,
        infection_status: event.current,
    });
}

pub fn init(context: &mut Context) -> Result<(), IxaError> {
    trace!("Initializing incidence_report");

    // Output directory is relative to the directory with the Cargo.toml file.
    let output_path = PathBuf::from(env!("CARGO_MANIFEST_DIR"));

    // In the configuration of report options below, we set `overwrite(true)`, which is not
    // recommended for production code in order to prevent accidental data loss. It is set
    // here so that newcomers won't have to deal with a confusing error while running
    // examples.
    context
        .report_options()
        .directory(output_path)
        .overwrite(true);
    context.add_report::<IncidenceReportItem>("incidence")?;
    context.subscribe_to_event::<InfectionStatusEvent>(handle_infection_status_change);
    Ok(())
}
Just pass a IncidenceReportItem to context.send_report()! We also emit a
trace log message so we can trace the execution of our model.
In the init() function there is a little bit of setup needed. Also, we can’t
forget to register this callback to listen to InfectionStatusEvents.
use std::path::PathBuf;

use ixa::prelude::*;
use ixa::trace;
use serde::Serialize;

use crate::infection_manager::InfectionStatusEvent;
use crate::people::{InfectionStatus, PersonId};

#[derive(Serialize, Clone)]
struct IncidenceReportItem {
    time: f64,
    person_id: PersonId,
    infection_status: InfectionStatus,
}

define_report!(IncidenceReportItem);

fn handle_infection_status_change(context: &mut Context, event: InfectionStatusEvent) {
    trace!(
        "Recording infection status change from {:?} to {:?} for {:?}",
        event.previous, event.current, event.entity_id
    );
    context.send_report(IncidenceReportItem {
        time: context.get_current_time(),
        person_id: event.entity_id,
        infection_status: event.current,
    });
}

pub fn init(context: &mut Context) -> Result<(), IxaError> {
    trace!("Initializing incidence_report");

    // Output directory is relative to the directory with the Cargo.toml file.
    let output_path = PathBuf::from(env!("CARGO_MANIFEST_DIR"));

    // In the configuration of report options below, we set `overwrite(true)`, which is not
    // recommended for production code in order to prevent accidental data loss. It is set
    // here so that newcomers won't have to deal with a confusing error while running
    // examples.
    context
        .report_options()
        .directory(output_path)
        .overwrite(true);
    context.add_report::<IncidenceReportItem>("incidence")?;
    context.subscribe_to_event::<InfectionStatusEvent>(handle_infection_status_change);
    Ok(())
}
Note that:
- the configuration you do on
context.report_options()applies to all reports attached to that context; - using
overwrite(true)is useful for debugging but potentially devastating for production; - this
init()function returns a result, which will be whatever error thatcontext.add_report()returns if the CSV file cannot be created for some reason, orOk(())otherwise.
result and handling errors
The Rust Result<U, V> type is an enum used for error handling. It
represents a value that can either be a successful outcome (Ok) containing a
value of type U, or an error (Err) containing a value of type V. Think
of it as a built-in way to return and propagate errors without relying on
exceptions, similar to using “Either” types or special error codes in other
languages.
The ? operator works with Result to simplify error handling. When you
append ? to a function call that returns a Result, it automatically checks
if the result is an Ok or an Err. If it’s Ok, the value is extracted; if
it’s an Err, the error is immediately returned from the enclosing function.
This helps keep your code concise and easy to read by reducing the need for
explicit error-checking logic.
If your IDE isn’t capable of adding imports for you, the external symbols we need for this module are as follows.
use std::path::PathBuf;

use ixa::prelude::*;
use ixa::trace;
use serde::Serialize;

use crate::infection_manager::InfectionStatusEvent;
use crate::people::{InfectionStatus, PersonId};

#[derive(Serialize, Clone)]
struct IncidenceReportItem {
    time: f64,
    person_id: PersonId,
    infection_status: InfectionStatus,
}

define_report!(IncidenceReportItem);

fn handle_infection_status_change(context: &mut Context, event: InfectionStatusEvent) {
    trace!(
        "Recording infection status change from {:?} to {:?} for {:?}",
        event.previous, event.current, event.entity_id
    );
    context.send_report(IncidenceReportItem {
        time: context.get_current_time(),
        person_id: event.entity_id,
        infection_status: event.current,
    });
}

pub fn init(context: &mut Context) -> Result<(), IxaError> {
    trace!("Initializing incidence_report");

    // Output directory is relative to the directory with the Cargo.toml file.
    let output_path = PathBuf::from(env!("CARGO_MANIFEST_DIR"));

    // In the configuration of report options below, we set `overwrite(true)`, which is not
    // recommended for production code in order to prevent accidental data loss. It is set
    // here so that newcomers won't have to deal with a confusing error while running
    // examples.
    context
        .report_options()
        .directory(output_path)
        .overwrite(true);
    context.add_report::<IncidenceReportItem>("incidence")?;
    context.subscribe_to_event::<InfectionStatusEvent>(handle_infection_status_change);
    Ok(())
}
Next Steps
We have created several new modules. We need to make sure they are each
initialized with the Context before the simulation starts. Below is main.rs
in its entirety.
// main.rs
// ANCHOR: header
mod incidence_report;
mod infection_manager;
mod people;
mod transmission_manager;

use ixa::{error, info, run_with_args, Context};

static POPULATION: u64 = 100;
static FORCE_OF_INFECTION: f64 = 0.1;
static INFECTION_DURATION: f64 = 10.0;
static MAX_TIME: f64 = 200.0;
// ANCHOR_END: header

fn main() {
    let result = run_with_args(|context: &mut Context, _args, _| {
        // Add a plan to shut down the simulation after `max_time`, regardless of
        // what else is happening in the model.
        context.add_plan(MAX_TIME, |context| {
            context.shutdown();
        });
        people::init(context);
        transmission_manager::init(context);
        infection_manager::init(context);
        incidence_report::init(context).expect("Failed to init incidence report");
        Ok(())
    });

    match result {
        Ok(_) => {
            info!("Simulation finished executing");
        }
        Err(e) => {
            error!("Simulation exited with error: {}", e);
        }
    }
}
Exercises
- Currently the simulation runs until
MAX_TIMEeven if every single person has been infected and has recovered. Add a check somewhere that callscontext.shutdown()if there is no more work for the simulation to do. Where should this check live? Hint: Usecontext.query_entity_count. - Analyze the data output by the incident reporter. Plot the number of people
with each
InfectionStatuson the same axis to see how they change over the course of the simulation. Are the curves what we expect to see given our abstract model? Hint: Remember this model has a fixed force of infection, unlike a typical SIR model. - Add another property that moderates the risk of infection of the individual.
(Imagine, for example, that some people wash their hands more frequently.)
Give a randomly sampled subpopulation that intervention and add a check to
the transmission module to see if the person that we are attempting to infect
has that property. Change the probability of infection accordingly.
Hint: You will probably need some new constants, a new person property, a new
random number generator, and the
Bernoullidistribution.
Topics
- Properties
- Indexing
- Burn-in Periods and Negative Time
- Handling Errors
- Performance and Profiling
- Profiling Module
randommodule- Reports
Properties
Properties are the data attached to an entity. For example, a Person entity might have the properties Age and
InfectionStatus. In Ixa, the property’s value type is also the property type: the implementation of the trait
Property<Person> by the concrete property type is what ties that Rust type to the Person entity.
Never implement Property<E> for an Entity type E directly. Instead, use one of the provided macros:
| Macro | Use case |
|---|---|
define_property! | Simple struct or enum property |
impl_property! | Existing type |
define_derived_property! | Simple derived struct or enum property |
impl_derived_property! | Existing type as a derived property |
define_multi_property! | Joint index/query key for multiple properties |
Properties Basics
Defining Properties
Most model code should define properties with define_property!:
use ixa::prelude::*;

define_entity!(Person);

define_property!(struct Age(u8), Person);

define_property!(
    enum InfectionStatus {
        Susceptible,
        Infectious,
        Recovered,
    },
    Person,
    default_const = InfectionStatus::Susceptible
);
The first argument is a Rust type declaration. The second argument is the entity the property belongs to. The optional
default_const = … argument gives the property a constant value for new entities that do not provide one explicitly.
Without it, every call to add_entity requires a value for the property.
More advanced use cases and options are covered in the sections below.
the newtype idiom in rust
For properties whose values are essentially primitive types like bool or u64, we always use the newtype idiom. A “newtype” is a tuple struct with a single field that wraps an existing type to give it a new, distinct identity:
struct Age(u8);Even though Age is “just” a u8 under the hood, the Rust compiler treats Age and u8 as completely different
types. You cannot accidentally pass a u8 where an Age is expected, nor mix up an Age with some other newtype like
struct BirthYear(u8). This is exactly what we want for properties: in Ixa, each property is identified by its Rust
type, so Age and BirthYear must be distinct types even when they happen to wrap the same primitive.
To read the inner value out of a newtype, use the tuple field accessor .0. To produce a new value, wrap a primitive
with the type’s constructor:
let age: Age = context.get_property(person_id);
let new_age = Age(age.0 + 1);   // unwrap with `.0`, do arithmetic, re-wrap
context.set_property(person_id, new_age);
If unwrapping and re-wrapping becomes tedious, you can implement methods or operator traits like Add directly on
your newtype so that model code can work with it more naturally. For a more thorough treatment of newtypes and what
they’re good for, see the chapter on
advanced types
in The Rust Book.
Property Initialization
Every property of an entity instance must have a value. (See the section Optional Properties for how to deal with
properties that are not always present.) How a property is initialized depends on how the property is defined and on
the property values supplied to add_entity.
Every property has one of three initialization behaviors:
| Kind | How to define it | How new entities get a value |
|---|---|---|
| Explicit | Omit default_const = … | The value must be supplied to add_entity with with! |
| Constant | Add default_const = … | The default is used unless a value is supplied with with! |
| Derived | Use define_derived_property! | The value is computed from other properties and cannot be set |
Derived properties are covered in the section Derived Properties. They are computed from other properties by definition, so it doesn’t make sense to initialize them explicitly.
An explicit property must be provided when the entity is created:
define_property!(struct Age(u8), Person);

let person = context.add_entity(with!(Person, Age(42)))?;
A property with a default constant can be omitted at entity creation:
define_property!(
    enum InfectionStatus {
        Susceptible,
        Infectious,
        Recovered,
    },
    Person,
    default_const = InfectionStatus::Susceptible
);

let person = context.add_entity(Person)?;
You can still override a property’s initial value constant:
let person = context.add_entity(with!(Person, InfectionStatus::Infectious))?;The word “constant” refers to the fact that the default value is not itself computed—it is a static value provided in
the property definition. The property itself, however, can still be overwritten after the fact with
context.set_property regardless of how it was initialized.
Getting and Setting Properties
Once an entity exists, use get_property and set_property:
// The person with ID `person_id` had a birthday.
let age: Age = context.get_property(person_id);
context.set_property(person_id, Age(age.0 + 1));
Derived properties are computed from their dependencies and update when those dependencies change. Therefore, you
cannot set a derived property directly with set_property.
You can also query by property values with with!:
// Get the set of all people who are infectious.
let infectious = context.query_result_iterator(with!(
    Person,
    InfectionStatus::Infectious
));
For performance-sensitive queries, see the chapter on Indexing.
Optional Properties
Sometimes you want a property that does not always have a meaningful value.
The idiomatic way to do this is to use a type of the form struct MyProperty(Option<ValueType>).
For example, you might store the time of a person’s last vaccination
as struct LastVaccination(Option<f64>).
define_property!(
    struct LastVaccination(Option<f64>),
    Person,
    impl_eq_hash = neither,
    default_const = LastVaccination(None)
);
Notice that we provided a default of LastVaccination(None), which stands for “no value set”. Because this example
contains an f64 and does not need to be indexed, we also pass impl_eq_hash = neither so define_property! does not
try to derive Eq and Hash. No manual Eq or Hash implementations are required for unindexed floating-point
properties.
See Floating Point Types and Implementing Eq and Hash for
the cases where Eq and Hash are still needed.
This is such a common pattern that Ixa detects the Option and provides a custom “display function” for it
for writing values to reports and diagnostics; see the section on
Custom Display and Option Properties.
Custom Display and Option Properties
Ixa uses each property’s display implementation in places where a property value
is rendered as text, including reports and diagnostics. By default,
impl_property! uses the property’s Debug representation.
the `display` and `debug` traits in rust
Rust types implement the Display and Debug traits to provide a textual representation of the type. Debug can be
automatically derived, shows a value in a developer-focused way, and is typically used for things like error
messages or logs. Display shows a value in a user-facing way. You write it yourself to produce clean, readable
output.
In the context of Ixa properties, a property’s “display function” is the function that is used to render a property
for reports. We use the type’s Debug representation by default because it can be automatically derived for most
types. Properties do not need to implement Display even if you supply a custom display function, although it can be
useful to do so.
The define_property! macro automatically detects the case of a struct wrapping
a single Option<T> field and provides a custom display function:
define_property!(
    struct DiagnosisDay(Option<u32>),
    Person,
    default_const = DiagnosisDay(None)
);
Without this special treatment, the values would display as:
| Value | Display |
|---|---|
DiagnosisDay(Some(14)) | “DiagnosisDay(Some(14))” |
DiagnosisDay(None) | “DiagnosisDay(None)” |
The macro overrides this to display the values as:
| Value | Display |
|---|---|
DiagnosisDay(Some(14)) | “14” |
DiagnosisDay(None) | “None” |
You can supply your own display function override for any property form using
define_property! as follows:
define_property!(
    enum InfectionStatus {
        Susceptible,
        Infectious,
        Recovered,
    },
    Person,
    default_const = InfectionStatus::Susceptible,
    display_impl = |status: &InfectionStatus| match status {
        InfectionStatus::Susceptible => "S".to_string(),
        InfectionStatus::Infectious => "I".to_string(),
        InfectionStatus::Recovered => "R".to_string(),
    }
);
Since the display_impl argument is attached to the impl Property<Entity> for ConcretePropertyType, a single
ConcretePropertyType can have different display functions for different entities for which it is a property.
When to Use impl_property!
Start with define_property! when the property can be expressed as one of its
supported type forms: a tuple struct, a named-field struct, or a simple enum:
define_property!(struct Age(u8), Person);

define_property!(
    struct Location {
        county: u16,
        tract: u32,
    },
    Person
);

define_property!(
    enum RiskGroup {
        Low,
        Medium,
        High,
    },
    Person
);
For these forms, define_property! creates the type, makes it public, adds the
standard derives, and then calls impl_property! for you. By default, the
standard derives are Debug, PartialEq, Eq, Hash, Clone, Copy,
serde::Serialize, and serde::Deserialize. The default includes Eq and
Hash so the property can be indexed or used as a hash-map key without more
boilerplate, but ordinary unindexed properties do not require those two traits.
Use the impl_eq_hash = … argument when the default Eq/Hash derives are
not possible or not wanted.
Use impl_property! when the type already exists or when the type declaration
needs syntax that define_property! does not support. The common reasons are:
- You require a different set of derives than
define_property!generates. - You need an unsupported type form, such as a type with attributes, generic parameters, or more complex Rust syntax.
- You want to use the same Rust type as a property for multiple different entity types.
When you use impl_property!, you are responsible for making sure the type
implements the traits Ixa requires for all properties: Copy, Clone,
Debug, and PartialEq. If you want to index the property with
context.index_property or context.index_property_counts, it must also
implement Eq and Hash.
If a manually declared property needs Eq or Hash and those traits cannot be
derived, use impl_property_eq!, impl_property_hash!, or
impl_property_eq_hash! to generate the same byte-based implementations used by
define_property!(…, impl_eq_hash = …). This most often comes up for
indexed properties containing f32 or f64. The type must derive
ixa::rkyv::Archive and ixa::rkyv::Serialize for these macros.
Example: You require different derives
If a property type needs derives beyond the standard set generated by
define_property!, define the type yourself and then use impl_property!.
For example, a property loaded from external data may need Deserialize:
#[derive(
    Copy,
    Clone,
    Debug,
    PartialEq,
    serde::Serialize,
    serde::Deserialize,
)]
pub struct Age(pub u8);

impl_property!(Age, Person);
This is enough for an ordinary property. Add or implement Eq and Hash as
well if this property will be indexed or used as a key in a hash map.
Example: You need an unsupported type form
define_property! intentionally supports a small set of common type
declarations. If the declaration needs field attributes, variant attributes,
generics, non-public fields, or other syntax outside those forms, write the type
directly.
For example, define_property! cannot attach a field-level serde attribute:
#[derive(Copy, Clone, Debug, PartialEq, serde::Serialize)]
pub struct HouseholdCode {
    #[serde(rename = "household")]
    pub value: u32,
}

impl_property!(
    HouseholdCode,
    Person,
    default_const = HouseholdCode { value: 0 }
);
Another common example is an enum that needs Default, because Rust requires
the default variant to be marked with #[default]:
#[derive(Copy, Clone, Debug, Default, PartialEq)]
pub enum InfectionStatus {
    #[default]
    Susceptible,
    Infectious,
    Recovered,
}

impl_property!(
    InfectionStatus,
    Person,
    default_const = InfectionStatus::Susceptible
);
Example: You want the same type on multiple entities
define_property! defines a new type and implements it as a property for one
entity. If you want the same Rust type to be a property of more than one entity,
use define_property! for the first entity, then call impl_property! for
each additional entity:
define_entity!(Person);
define_entity!(Group);

define_property!(
    enum InfectionKind {
        Respiratory,
        Genetic,
    },
    Person,
    default_const = InfectionKind::Respiratory
);

impl_property!(
    InfectionKind,
    Group,
    default_const = InfectionKind::Genetic
);
Derived Properties
A derived property is computed from other properties instead of stored directly.
Use define_derived_property! for the common case:
define_property!(struct Age(u8), Person);

define_derived_property!(
    enum AgeGroup {
        Child,
        Adult,
        Senior,
    },
    Person,
    [Age],
    |age| {
        if age.0 < 18 {
            AgeGroup::Child
        } else if age.0 < 65 {
            AgeGroup::Adult
        } else {
            AgeGroup::Senior
        }
    }
);
The dependency list tells Ixa which stored properties affect the derived value. When one of those dependencies changes, Ixa can update indexes and property change events for the derived property.
Derived properties can depend on more than one property:
define_property!(struct Vaccinated(bool), Person, default_const = Vaccinated(false));

define_derived_property!(
    struct HighPriority(bool),
    Person,
    [Age, Vaccinated],
    |age, vaccinated| HighPriority(age.0 >= 65 && !vaccinated.0)
);
Derived properties can also depend on global properties. Put global dependencies in a second bracketed list after the entity-property dependencies:
define_global_property!(AdultAge, u8);

define_derived_property!(
    struct IsAdult(bool),
    Person,
    [Age],
    [AdultAge],
    |age, adult_age| IsAdult(age.0 >= *adult_age)
);
Use impl_derived_property! when the derived property type already exists, just
as you would use impl_property! instead of define_property! for a
non-derived property.
The same trait rule applies to derived properties: all derived properties need
Copy, Clone, Debug, and PartialEq; derived properties that are indexed
also need Eq and Hash. The define_derived_property! macro includes
Eq and Hash in its default derives, just like define_property!, unless
you pass impl_eq_hash = ….
Floating Point Types and Implementing Eq and Hash
All properties participate in equality for unindexed query scans, so every property needs PartialEq. Indexed
properties have the additional requirements of Eq and Hash because property indexes are hash maps keyed by property
value.
Plain f64 and f32 values implement PartialEq, so they can be used in
ordinary unindexed properties. They do not implement Eq or Hash, so a
floating-point property needs special handling only when:
- you use the default
define_property!ordefine_derived_property!form, which tries to deriveEqandHashunless told otherwise; - you index the property with
context.index_propertyorcontext.index_property_counts; - you use the property as part of an indexed multi-property; or
- you use the property type as a key in a
HashMaporHashSet.
implementing `partialeq` and `eq` in rust
Indexed properties need to implement Eq. In practice, this actually means implementing PartialEq. In fact, the Eq trait
is just a marker trait; it has no methods! The Eq trait is a guarantee by the author that the implementation of
PartialEq is reflexive. Rust also requires that PartialEq
is symmetric and transitive.
Unindexed floating-point properties
If a floating-point property will not be indexed and will not be used as a hash
map key, pass impl_eq_hash = neither to define_property! or
define_derived_property!:
define_property!(
    struct Weight(f64),
    Person,
    impl_eq_hash = neither,
    default_const = Weight(0.0)
);
That tells the macro not to derive or generate Eq and Hash. No manual Eq
or Hash implementations are required for this unindexed case.
If you define the type yourself and call impl_property! or
impl_derived_property!, derive or implement the ordinary property traits:
Copy, Clone, Debug, and PartialEq. Do not add Eq and Hash unless the
property needs to be indexed or used as a key.
Indexed or hash-keyed floating-point properties
If a floating-point property is indexed, is part of an indexed multi-property,
or is used as a hash-map key, it must implement Eq and Hash. There are three
reasonable ways to do that.
- Let Ixa generate equality and hashing for you.
- Implement equality and hashing yourself.
- Use an alternative floating-point type.
Let Ixa generate equality and hashing
Ixa can generate byte-based equality and hashing either when it defines the
property type for you or when you declare the type yourself and register it with
impl_property! or impl_derived_property!.
Types declared with define_property! or define_derived_property!
Pass impl_eq_hash = both as the first optional argument to
define_property! or define_derived_property!:
define_property!(
    struct Weight(f64),
    Person,
    impl_eq_hash = both,
    default_const = Weight(0.0)
);
This is the shortest option when you define the property with a define_*
macro, want to keep the property as an f64, and are comfortable with Ixa’s
generated equality and hashing behavior. It is a good fit for simple measured
quantities where model code still wants direct access to a floating-point value.
You can also use only impl_eq_hash = Eq or only impl_eq_hash = Hash when
one trait can still be derived but the other needs Ixa’s generated
implementation. Floating-point properties usually need both.
The generated implementations are reasonably efficient, but they are not optimal. If performance is absolutely critical, use either of the other options.
Manually declared types registered with impl_*_property!
For a type declared manually and registered with impl_property! or
impl_derived_property!, use the standalone equality and hashing macros instead
of the impl_eq_hash parameter.
| Macro | Purpose |
|---|---|
impl_property_eq! | Implements PartialEq and Eq |
impl_property_hash! | Implements Hash |
impl_property_eq_hash! | Convenience macro that invokes both macros |
#[derive(
    Copy,
    Clone,
    Debug,
    serde::Serialize,
    serde::Deserialize,
    ixa::rkyv::Archive,
    ixa::rkyv::Serialize,
)]
#[rkyv(crate = ixa::rkyv)]
struct Weight(f64);

impl_property_eq_hash!(Weight);
impl_property!(Weight, Person, default_const = Weight(0.0));
Use impl_property_eq! or impl_property_hash! when you only want Ixa to
generate one of the two implementations. These macros are only needed when the
property actually needs the corresponding trait, such as when it will be indexed
or used as a key. Manually declared types using these macros must derive
ixa::rkyv::Archive and ixa::rkyv::Serialize, as shown above.
Implement equality and hashing yourself
Pass impl_eq_hash = neither when you want define_property! to create the
type but you want to provide PartialEq, Eq, and Hash yourself:
use std::hash::{Hash, Hasher};

define_property!(
    struct Weight(f64),
    Person,
    impl_eq_hash = neither,
    default_const = Weight(0.0)
);

impl PartialEq for Weight {
    fn eq(&self, other: &Self) -> bool {
        self.0.to_bits() == other.0.to_bits()
    }
}

impl Eq for Weight {}

impl Hash for Weight {
    fn hash<H: Hasher>(&self, state: &mut H) {
        self.0.to_bits().hash(state);
    }
}
Choose this option when you want to use f32 / f64 instead of OrderedFloat or equivalent alternative float type
and performance is absolutely crucial. It is usually straightforward to implement PartialEq and Hash for
floating-point types, but you should ensure that your implementations satisfy the property that equal values have the
same hash:
if a == b {
    assert_eq!(hash(a), hash(b));
}
For sensible equality semantics, equality should also be reflexive, symmetric, and transitive as well.
Use an alternative floating-point type
Use a wrapper type from a crate such as
decorum or
ordered-float when you want a type
that gives floating-point values a total ordering and implements the traits Ixa
needs:
use ordered_float::OrderedFloat;

// A type alias is always a good idea here. It allows you to swap out the underlying
// type without having to change the rest of your code.
pub type Float = OrderedFloat<f64>;

define_property!(
    struct Weight(Float),
    Person,
    default_const = Weight(OrderedFloat(0.0))
);
With these types, define_property! can just derive the PartialEq, Eq,
and Hash traits that indexed or hash-keyed properties need, and performance
of these derived implementations is usually optimal. This option is especially
attractive when you want to restrict your type only to the real numbers, or only
to the extended real numbers (infinities but not NaNs), giving you a numeric
type with exactly the mathematical semantics you want.
The trade-off is that model code works with the wrapper type instead of a bare f64, and while these libraries do what
they can to alleviate friction, having to convert to and from primitive f64 values is often unavoidable. This is
really the only downside. The good news is, this conversion is usually only cosmetic: the compiler usually optimizes it
away.
Multi-Properties
A multi-property is a derived tuple of several properties. Its main purpose is to support efficient multi-property indexes and queries:
define_property!(struct Age(u8), Person);
define_property!(
    enum InfectionStatus {
        Susceptible,
        Infectious,
        Recovered,
    },
    Person,
    default_const = InfectionStatus::Susceptible
);

define_multi_property!(Person, (Age, InfectionStatus));

context.index_property::<Person, AgeInfectionStatus>();
For a deeper discussion of when to create multi-property indexes, see Indexing. Because the components
of a multi-property are already required to be properties, multi-properties usually “just work”. If a multi-property
will be indexed, each component value must also support Eq and Hash; this mainly matters for components containing
plain f32 or f64.
Troubleshooting
f64 does not implement Eq
If you define a property containing an f64 with the default macro form:
define_property!(struct Weight(f64), Person);you may see an error like:
error[E0277]: the trait bound `f64: std::cmp::Eq` is not satisfied
or:
the trait `std::cmp::Eq` is not implemented for `f64`
This happens because define_property! normally derives Eq and Hash, but
Rust floating-point types do not implement those traits. See
Floating Point Types and Implementing Eq and Hash
for the full discussion. In short:
- If the property is not indexed and is not used as a hash-map key, pass
impl_eq_hash = neither. No manualEqorHashimplementations are required. - If the property is indexed or used as a key, pass
impl_eq_hash = bothto let Ixa generate equality and hashing, provide your own implementations withimpl_eq_hash = neither, or use a wrapper such asordered_float::OrderedFloat<f64>or a type fromdecorum.
Understanding Indexing in Ixa
Syntax and Best Practices
Syntax:
// For single property indexes
// Somewhere during the initialization of `context`:
context.index_property::<Person, Age>();

// For multi-indexes
// Where properties are defined:
define_multi_property!(Person, (Name, Age, Weight));
// Somewhere during the initialization of `context`:
context.index_property::<Person, (Name, Age, Weight)>();
Best practices:
- Index a property to improve performance of queries of that property.
- Create a multi-property index to improve performance of queries involving multiple properties.
- The cost of creating indexes is increased memory use, which can be significant for large populations. So it is best to only create indexes / multi-indexes that actually improve model performance.
- It may be best to call
context.index_property::<Entity, Property<Entity>>()in theinit()method of the module in which the property is defined, or you can put all of yourContext::index_propertycalls together in a main initialization function if you prefer. - It is not an error to call
Context::index_propertyin the middle of a running simulation or to call it twice for the same property. - Calling
Context::index_propertyenables indexing and catches the index up to the current population at the time of the call.
Property Value Storage in Ixa
To understand why some operations in Ixa are slow without an index, we need to understand how property data is stored internally and how an index provides Ixa an alternative view into that data.
In Ixa, each agent in a simulation—such as a person in a disease transmission model—is associated with a unique row of data. This data is stored in columnar form, meaning each property or field of a person (such as infection status, age, or household) is stored as its own column. This structure allows for fast and memory-efficient processing.
Let’s consider a simple example with two fields: PersonId and
InfectionStatus.
PersonId: a unique identifier for each individual, which is represented as an integer internally (e.g., 1001, 1002, 1003, …).InfectionStatus: a status value indicating whether the individual issusceptible,infected, orrecovered.
At a particular time during our simulation, we might have the following data:
PersonId | InfectionStatus |
|---|---|
| 0 | susceptible |
| 1 | infected |
| 2 | susceptible |
| 3 | recovered |
| 4 | susceptible |
| 5 | susceptible |
| 6 | infected |
| 7 | susceptible |
| 8 | infected |
| 9 | susceptible |
| 10 | recovered |
| 11 | infected |
| 12 | infected |
| 13 | infected |
| 14 | recovered |
In the default representation used by Ixa, each field is stored as a column.
Internally, however, PersonId is not stored explicitly as data. Instead, it
is implicitly defined by the row number in the columnar data structure. That
is:
- The row number acts as the unique index (
PersonId) for each individual. - The
InfectionStatusvalues are stored in a single contiguous array, where the entry at positionigives the status for the person withPersonIdequal toi.
In this default layout, accessing the infection status for a person is a simple array lookup, which is extremely fast and requires minimal memory overhead.
But suppose instead of looking up the infection status of a particular
PersonId, you wanted to look up which PersonId’s were associated to a
particular infection status, say, infected. If the the property is not
indexed, Ixa has to scan through the entire column and collect all PersonId’s
(row numbers) for which InfectionStatus has the value infected, and it has
to do this each and every time we run a query for that property. If we do this
frequently, all of this scanning can add up to quite a long time!
Property Index Structure
We could save a lot of time if we scanned through the InfectionStatus column
once, collected the PersonId ’s for each InfectionStatus value, and just
reused this table each time we needed to do this lookup. That’s all an index is!
The index for our example column of data:
InfectionStatus | List of PersonId ’s |
|---|---|
susceptible | [0, 2, 4, 5, 7, 9] |
infected | [1, 6, 8, 11, 12, 13] |
recovered | [3, 10, 14] |
An index in Ixa is just a map between a property value and the list of all
PersonId’s having that value. Now looking up the PersonId’s for a given
property value is (almost) as fast as looking up the property value for a given
PersonId.
The Costs of Creating an Index
There are two costs you have to pay for indexing:
- The index needs to be maintained as the simulation evolves the state of the population. Every change to any person’s infection status needs to be reflected in the index. While this operation is fast for a single update, it isn’t instant, and the accumulation of millions of little updates to the index can add up to a real runtime cost.
- The index uses memory. In fact, it uses more memory than the original column
of data, because it has to store both the
InfectionStatusvalues (in our example) and thePersonIdvalues, while the original column only stores theInfectionStatus(thePersonId’s were implicitly the row numbers).
creating vs. maintaining an index
Suspiciously missing from this list of costs is the initial cost of scanning through the property column to create the index in the first place, but actually whether you maintain the index from the very beginning or you index it all at once doesn’t matter: the sum of all the small efforts to update the index every time a person is added is equal to the cost of creating the index from scratch for an existing set of data.
Usually scanning through the whole property column is so slow relative to maintaining an index that the extra computational cost of maintaining the index is completely dwarfed by the time savings, even for infrequently queried properties. In other words, in terms of running time, an index is almost always worth it. For smaller population sizes in particular, at worst you shouldn’t see a meaningful slow-down.
Memory use is a different story. In a model with tens of millions of people and many properties, you might want to be more thoughtful about which properties you index, as memory use can reach into the gigabytes. While we are in an era where tens of gigabytes of RAM is commonplace in workstations, cloud computing costs and the selection of appropriate virtual machine sizes for experiments in production recommend that we have a feel for whether we really need the resources we are using.
a query might be the wrong tool for the job
Sometimes, the best way to address a slow query in your model isn’t to add indexes, but to remove the query entirely. A common scenario is when you want to report on some aggregate statistics, for example, the total number of people having each infectiousness status. It might be much better to just track the aggregate value directly than to run a query for it every time you want to write it to a report. As usual, when it comes to performance issues, measure your specific use case to know for sure what the best strategy is.
Multi Property Indexes
To speed up queries involving multiple properties, use a multi-property index
(or multi-index for short), which indexes multiple properties jointly.
Suppose we have the properties AgeGroup and InfectionStatus, and we want to
speed up queries of these two properties:
let query = with!(Person, AgeGroup(30), InfectionStatus::Susceptible);
let age_and_status = context.query_result_iterator(query); // Bottleneck
We could index AgeGroup and InfectionStatus individually, but in this case
we can do even better with a multi-index, which treats the pairs of values
(AgeGroup, InfectionStatus) as if it were a single value. Such a multi-index
might look like this:
(AgeGroup, InfectionStatus) | PersonId’s |
|---|---|
(10, susceptible) | [16, 27, 31] |
(10, infected) | [38] |
(10, recovered) | [18, 23, 29, 34, 39] |
(20, susceptible) | [12, 25, 26] |
(20, infected) | [2, 3, 9, 14, 17, 19, 28, 33] |
(20, recovered) | [13, 20, 22, 30, 37] |
(30, susceptible) | [0, 1, 11, 21] |
(30, infected) | [5, 6, 7, 10, 15, 24, 32] |
(30, recovered) | [4, 8, 35, 36] |
Ixa hides the boilerplate required for creating a multi-index with the macro
define_multi_property!:
define_multi_property!(Person, (AgeGroup, InfectionStatus));Queries are order-insensitive for multi-property indexes: a query written with
AgeGroup before InfectionStatus can use the same multi-property index as a
query written in the opposite order. If you define multiple equivalent
multi-properties with the same component properties in different orders, Ixa
chooses the first registered one for query routing. Index that representative
multi-property; attempting to index a later equivalent multi-property will
panic because queries cannot use that duplicate index.
Creating a multi-index does not automatically create indexes for each of the properties individually, but you can do so yourself if you wish, for example, if you had other single property queries you want to speed up.
The Benefits of Indexing - A Case Study
In the Ixa source repository you will find the births-deaths example in the
examples/ directory. You can build and run this example with the following
command:
cargo run --example births-death
Now let’s edit the input.json file and change the population size to 1000:
{
    "population": 1000,
    "max_time": 780.0,
    "seed": 123,
    ⋮
}
We can time how long the simulation takes to run with the time command. Here’s
what the command and output look like on my machine:
$ time cargo run --example births-deaths
    Finished `dev` profile [unoptimized + debuginfo] target(s) in 0.30s
     Running `target/debug/examples/births-deaths`
cargo run --example births-deaths  362.55s user 1.69s system 99% cpu 6:06.35 total
For a population size of only 1000 it takes more than six minutes to run!
Let’s index the InfectionStatus property. In
examples/births-deaths/src/lib.rs we add the following line somewhere in the
initialize() function:
context.index_property::<Person, InfectionStatus>();We also need to import InfectionStatus by putting
use crate::population_manager::InfectionStatus; near the top of the file. To
be fair, let’s compile the example separately so we don’t include the compile
time in the run time:
cargo build --example births-deaths
Now run it again:
$ time cargo run --example births-deaths
    Finished `dev` profile [unoptimized + debuginfo] target(s) in 0.09s
     Running `target/debug/examples/births-deaths`
cargo run --example births-deaths  5.79s user 0.07s system 97% cpu 5.990 total
From six minutes to six seconds! This kind of dramatic speedup is typical with indexes. It allows models that would otherwise struggle with a population size of 1000 to handle populations in the tens of millions.
Exercises:
- Even six seconds is an eternity for modern computer processors. Try to get this example to run with a population of 1000 in ~1 second*, two orders of magnitude faster than the unindexed version, by indexing other additional properties.
- Using only a single property index of
InfectionStatusand a single multi-index, get this example to run in ~0.5 seconds. This illustrates that it’s better to index the right properties than to just index everything.
*Your timings will be different but should be roughly proportional to these.
Burn-in Periods and Negative Time
Syntax Summary
Burn-in is implemented by setting a negative start time and treating 0.0 as the beginning of the analysis window:
context.set_start_time(-d);Introduction
In many epidemiological and agent-based models, the state you care about at time 0.0 does not arise instantaneously.
Populations need time to stabilize. Households and partnerships need to form. Immunity must reflect prior exposure rather than arbitrary assignment. Latent infections may need to be seeded and allowed to evolve into a realistic distribution. In short, the model often needs to run before it begins.
A common but fragile solution is to run a separate “initialization” simulation, snapshot its state, and then start a second simulation for analysis. This approach complicates reproducibility and splits what is conceptually one model into multiple executions.
Ixa provides a simpler mechanism: treat burn-in as part of the same execution. Instead of resetting time or stitching simulations together, you allow the timeline to extend into negative values. You then designate 0.0 as the beginning of your analysis window.
Negative time is not a special execution mode in Ixa. It is simply earlier simulation time. The event queue, scheduling rules, and execution semantics are identical before and after 0.0. What may differ is your model logic. You may choose to disable transmission, suppress reporting, use alternate parameters, or run simplified dynamics during burn-in. These differences arise from your code, not from special treatment by the framework.
The Core Pattern
Burn-in in Ixa is implemented by extending the simulation timeline into negative values and treating 0.0 as the beginning of the analysis window. There is only one execution and one event queue; burn-in and the main simulation evolve on the same continuous timeline.
The core pattern is:
- Choose a burn-in duration (for example, 180 days).
- Set the simulation start time to the negative of that duration.
- Differentiate burn-in behavior from main-simulation behavior using one of the two methods below.
There are two standard approaches:
- Time-gated logic: behavior depends directly on the current time with
context.get_current_time() >= 0.0checks throughout the code. - Activation at
0.0: a plan scheduled at time0.0enables or modifies model state (for example, by turning on transmission, enabling interventions, or beginning data collection).
Both approaches operate on the same continuous timeline. The choice depends on whether you prefer localized time checks or a single activation event at 0.0. There is no automatic transition at 0.0. Any change in behavior must be implemented explicitly in your model.
1. Activation at 0.0
Schedule a plan at 0.0 that enables or modifies model behavior. For example, transmission, reporting, or interventions may be turned on at the boundary. This approach centralizes the transition logic in a single plan.
The following example burns in for 180 days and enables full model dynamics at time 0.0:
use ixa::prelude::*;

let mut context = Context::new();

// Burn in for 180 days before the "official" start.
context.set_start_time(-180.0);

// Optional: perform initialization at the start of burn-in.
context.add_plan(-180.0, |ctx| {
    // Initialize or seed state here.
});

// Method 1: Activation at 0.0
context.add_plan_with_phase(
    0.0,
    |ctx| {
        // Enable full dynamics, reporting, interventions, etc.
    },
    ExecutionPhase::First
);

context.execute();
In this example we use context.add_plan_with_phase with ExecutionPhase::First instead of the usual context.add_plan so that the activation plan runs before any other plans that happen to be scheduled at time 0.0.
2. Time-Gated Logic in Model Code
Partition behavior directly by checking the current time:
fn transmission_step(context: &mut Context) {
    if t < context.get_current_time() {
        // Burn-in behavior
        return;
    }
    // Main simulation behavior
}
This approach makes the phase boundary explicit in the code where behavior occurs. The downside is that you might need to do this check in many different disparate places within model code.
Practical Considerations
Burn-in relies on the same scheduling rules as the rest of the simulation. The following constraints are important when working with negative time.
Set the Start Time Before Execution
context.set_start_time(…) must be called before context.execute() and may only be called once.
The start time may be set to an arbitrarily low number. When execution begins, the event queue advances directly to the earliest scheduled plan. If burn-in plans are scheduled stochastically, it may be useful to choose a sufficiently low start time such that the probability of scheduling a plan earlier than the start time is effectively zero.
Plans Cannot Be Scheduled Earlier Than the Effective Start Time
A plan cannot be scheduled earlier than the simulation’s effective current time. Before execution begins:
- If no start time is set, the earliest allowable plan time is
0.0. - If
start_time = s, the earliest allowable plan time iss.
For burn-in, this means you must set a negative start time before scheduling any negative-time plans.
Periodic Plans Begin at 0.0
add_periodic_plan_with_phase(…) schedules its first execution at 0.0, not at the simulation start time. This is often desirable: reporting or intervention logic naturally begins at the analysis boundary. However, periodic behavior will not automatically run during negative-time burn-in.
If periodic activity is required during burn-in, schedule the first execution manually at the desired negative time and reschedule from there.
Reports and Outputs Include Negative Timestamps
Outputs generated during burn-in will carry negative timestamps. This is usually intentional. If downstream analysis should begin at 0.0, filter during post-processing or guard reporting logic within the model.
Include Negative Time in Initialization Tests
If negative time is part of your model initialization strategy, unit tests that validate initialization behavior may also need to include negative-time execution. Tests that assume the model begins at 0.0 may otherwise miss burn-in effects.
0.0 Convention, Not a Reset
Time does not reset at 0.0. The event queue continues uninterrupted across the boundary. Any transition in behavior at 0.0 must be implemented explicitly in model logic or in a plan scheduled at that time.
Common Burn-in Designs
Burn-in is not limited to simple state initialization. In practice, it is used to execute a specialized variant of the model prior to the analysis window. Several patterns recur frequently.
Reduced or Modified Dynamics
During burn-in, some components of the model may operate differently:
- Transmission disabled while demography and recovery remain active.
- Alternate parameter values used to drive the system toward a desired state.
- Simplified dynamics used to establish equilibrium.
These differences are implemented through time-gated logic or by enabling full dynamics at 0.0.
Network or Structure Formation
In models with dynamic networks—households, partnerships, contact graphs—it is often desirable to allow the structure to stabilize before transmission begins. Burn-in provides a period during which relationships can form, dissolve, and equilibrate before infections are introduced or measurement begins.
Seeding and Equilibrium Targeting
Rather than assigning initial states arbitrarily, models may:
- Introduce infections gradually.
- Allow immunity to accumulate through prior exposure.
- Run until summary metrics stabilize before beginning analysis.
Negative time allows this process to occur within the same execution, without splitting the model into separate runs.
Delayed Reporting or Intervention
Often, the model’s full dynamics operate throughout burn-in, but outputs or interventions are suppressed until t >= 0.0. In this case, burn-in shapes the system state, while the analysis window determines what is recorded or evaluated.
Burn-in is therefore not a distinct modeling technique. It is a scheduling strategy that allows different behaviors to operate before and after a chosen time boundary on a single continuous timeline.
Handling Errors
Ixa generates errors using its IxaError type. In Ixa v2, this error type is intended only for errors Ixa itself
generates. For errors your own code produces, it is up to you to create your own error type or use a “universal” error
type crate like anyhow.
Summary
Use anyhow and its universal error type if:
- you want an easy, no-nonsense way to deal with errors with the least amount of effort
- you don’t need to define your own error types or variants
Use thiserror to help you easily define your own error type if:
- you want to have your own error types / error enum variants
- you want control over how you manage errors in your model
Creating your own error types
You might want your own error type if you want to generate structured errors from your own code or want your own
structured error handling code. For example, you might want to have functions that return Result<U, V> to indicate
that they might fail:
fn get_itinerary(person_id: PersonId, context: &Context) -> Result<Itinerary, ModelError> {
    // If we can't retrieve an itinerary for the given person, we return an error
    // that gives information about what went wrong:
    return Err(ModelError::NoItineraryForPerson);
}
When you call this function, you can take more specific action based on what it returns:
match get_itinerary(person_id, context) {
    Ok(itinerary) => {
        /* Do something with the itinerary */
    }
    Err(ModelError::NoItineraryForPerson) => {
        /* Handle the `NoItineraryForPerson` error */
    }
    Err(err) => {
        /* A different error occurred; handle it in a different way */
    }
}
The thiserror crate reduces the boilerplate you have to write to
implement your own error types (an enum implementing the std::error::Error trait). In practice, model code often
needs to report different types of errors:
- errors defined by the model itself
- errors returned by Ixa APIs such as
context.add_report() - errors from other crates or from the standard library
That usually means your error enum contains a mix of your own variants and variants that wrap foreign error types. For example:
use ixa::error::IxaError;
use thiserror::Error;

#[derive(Error, Debug)]
pub enum ModelError {
    #[error("model error: {0}")]
    ModelError(String),

    #[error("Ixa error")]
    IxaError(#[from] IxaError),

    #[error("string error")]
    StringError(#[from] std::string::FromUtf8Error),

    #[error("parse int error")]
    ParseIntError(#[from] std::num::ParseIntError),

    #[error("Ixa csv error")]
    CsvError(#[from] ixa::csv::Error),
}
thiserror automatically generates:
impl std::error::Error for ModelErrorimpl Display for ModelErrorFrom<IxaError>,From<std::string::FromUtf8Error>,From<std::num::ParseIntError>, andFrom<ixa::csv::Error>(because of#[from])source()wiring for error chaining
That last item is what lets one error wrap another: The std::error::Error
trait has a source(&self) -> Option<&(dyn Error + ’static)> method. When an
error returns another error from source(), it is saying “this error happened
because of that other error.” Error reporters can then walk the chain and show
both the top-level message and the underlying cause.
You can implement all of this without the thiserror crate, but
thiserror saves you a lot of boilerplate. With
thiserror, you usually do not write source() yourself. A field
marked with #[from] or #[source] is treated as the underlying cause and returned from source() automatically.
#[from] also generates the corresponding From<…> impl, while #[source] only marks the wrapped error as the
cause.
This shows several useful patterns:
ModelError::ModelErroris a model-specific error variant that you define yourself.ModelError::IxaErrorwraps anyIxaErrorvariant, which is useful when Ixa code returns anIxaErrorand you want to propagate it as part of your model’s error type.ModelError::CsvErrorwraps errors returned from the vendored CSV crate.ModelError::StringErrorandModelError::ParseIntErrorwrap standard library error types.
All of these wrapped variants participate in the standard error chain through source(). If one of your model
functions calls into Ixa or another library and that call fails, your model error can preserve the original cause while
still returning a single model-specific error type.
For example, if you want to add model-specific context around an IxaError instead of directly converting it with
#[from], you can write:
use ixa::error::IxaError;
use thiserror::Error;

#[derive(Error, Debug)]
pub enum ModelError {
    #[error("failed to load itinerary for person {person_id}")]
    LoadItinerary {
        person_id: PersonId,
        #[source]
        source: IxaError,
    },
}
Now Display prints the outer message, while source() returns the inner
IxaError, such as IxaError::NoGlobalProperty { .. }. This is useful when you want the error to say what your model
was trying to do, but you also want to preserve the lower-level Ixa failure as the underlying cause. Callers can then
pattern-match on ModelError and still inspect or report the original cause through the standard error chain.
Using the anyhow crate to easily propagate errors
Where thiserror is for defining your own structured error types,
anyhow provides a single concrete error type for you: anyhow::Error. Its
major selling point is propagating errors ergonomically in applications.
Easy error propagation
Instead of:
fn do_work() -> Result<T, MyError>you can write:
fn do_work() -> anyhow::Result<T>and use ? with almost anything that implements std::error::Error. No custom enum required, and no From
boilerplate-it automatically converts into anyhow::Error.
Attaching additional context to errors
This is one of the strongest features:
use anyhow::Context;

read_file(path).with_context( | | format!("Failed reading {}", path))?;
This produces an error chain like:
Failed reading config.json
Caused by:
    No such file or directory
That is extremely ergonomic.
Automatic Backtraces
If enabled:
anyhowcaptures backtraces automatically- No custom wiring required
Downsides to anyhow
Unlike creating your own error types with thiserror, anyhow erases concrete type information. That means you cannot
pattern-match on the original error type unless you downcast.
Performance and Profiling
Indexing
Indexing properties that are queried repeatedly in your simulation can lead to dramatic speedups. It is not uncommon to see two or more orders of magnitude of improvement in some cases. It is also very simple to do.
You can index a single property, or you can index multiple properties jointly.
Just include the following method call(s) during the initialization of
context, replacing the example property names with your own:
// For single property indexes
// Somewhere during the initialization of `context`:
context.index_property::<Person, Age>();

// For multi-indexes
// Where properties are defined:
define_multi_property!(Person, (Name, Age, Weight));
// Somewhere during the initialization of `context`:
context.index_property::<Person, (Name, Age, Weight)>();
The cost of creating indexes is increased memory use, which can be significant for large populations. So it is best to only create indexes / multi-indexes that actually improve model performance, especially if cloud computing costs / VM sizes are an issue.
See the chapter on Indexing for full details.
Optimizing Performance with Build Profiles
Build profiles allow you to configure compiler settings for different kinds of
builds. By default, Cargo uses the dev profile, which is usually what you want
for normal development of your model but which does not perform optimization.
When you are ready to run a real experiment with your project, you will want to
use the release build profile, which does more aggressive code optimization
and disables runtime checks for numeric overflow and debug assertions. In some
cases, this can improve performance dramatically.
The
Cargo documentation for build profiles
describes many different settings you can tweak. You are not limited to Cargo’s
built in profiles either. In fact, you might wish to create your own profile for
creating flame graphs, for example, as we do in the section on flame graphs
below. These settings go under [profile.release] or a custom profile like
[profile.bench] in your Cargo.toml file. For maximum execution speed,
the key trio is:
[profile.release]
opt-level = 3     # Controls the level of optimization. 3 = highest runtime speed. "s"/"z" = size-optimized.
lto = true        # Link Time Optimization. Improves runtime performance by optimizing across crate boundaries.
codegen-units = 1 # Number of codegen units. Lower = better optimization. 1 enables whole-program optimization.
The Cargo documentation for build profiles describes a few more settings that can affect runtime performance, but these are the most important.
Ixa Profiling Module
For Ixa’s built-in profiling (named counts, spans, and JSON output), see the Profiling Module topic.
Visualizing Execution with Flame Graphs
Samply and Flame Graph are easy to use profiling tools that generate a “flame graph” that visualizes stack traces, which allow you to see how much execution time is spent in different parts of your program. We demonstrate how to use Samply, which has better macOS support.
Install the samply tool with Cargo:
cargo install samply
For best results, build your project in both release mode and with debug
info. The easiest way to do this is to make a build profile, which we name
“profiling” below, by adding the following section to your Cargo.toml file:
[profile.profiling]
inherits = "release"
debug = true
Now when we build the project we can specify this build profile to Cargo by name:
cargo build --profile profiling
This creates your binary in target/profiling/my_project, where my_project is
standing in for the name of the project. Now run the project with samply:
samply record ./target/profiling/my_project
We can pass command line arguments as usual if we need to:
samply record ./target/profiling/my_project arg1 arg2
When execution completes, samply will open the results in a browser. The graph looks something like this:

The graph shows the “stack trace,” that is, nested function calls, with a
“deeper” function call stacked on top of the function that called it, but does
not otherwise preserve chronological order of execution. Rather, the width of
the function is proportional the time spent within the function over the course
of the entire program execution. Since everything is ultimately called from your
main function, you can see main at the bottom of the pile stretching the
full width of the graph. This way of representing program execution allows you
to identify “hot spots” where your program is spending most of its time.
Using Logging to Profile Execution
For simple profiling during development, it is easy to use logging to measure how long certain operations take. This is especially useful when you want to understand the cost of specific parts of your application — like loading a large file.
cultivate good logging habits
It’s good to cultivate the habit of adding trace! and debug! logging
messages to your code. You can always selectively enable or disable messages
for different parts of your program with per-module log level filters. (See
the logging module documentation for
details.)
Suppose we want to know how long it takes to load data for a large population before we start executing our simulation. We can do this with the following pattern:
use std::fs::File;
use std::io::BufReader;
use std::time::Instant;
use ixa::trace;

fn load_population_data(path: &str, context: &mut Context) {
    // Record the start time before we begin loading the data.
    let start = Instant::now();

    let file = File::open(path)?;
    let mut reader = BufReader::new(file);
    // .. code to load in the data goes here ...

    // This line computes the time that has elapsed since `start`.
    let duration = start.elapsed();
    trace!("Loaded population data from {} in {:?}", path, duration);
}
Additional Resources
For an in-depth look at performance in Rust programming, including many advanced tools and techniques, check out The Rust Performance Book.
Profiling Module
Ixa includes a lightweight, feature-gated profiling module you can use to:
- Count named events (and compute event rates)
- Time named operations (“spans”)
- Print results to the console
- Write results to a JSON file along with execution statistics
The API lives under ixa::profiling and is behind the profiling Cargo feature
(disabled by default). If you do not enable the feature, the API becomes a no-op
so you can leave profiling calls in your code.
When running the built-in profiling example from the root crate, enable the feature explicitly:
cargo run --example profiling --features profiling
Example console output
Span Label                           Count          Duration  % runtime
----------------------------------------------------------------------
load_synth_population                    1       950us 792ns      0.36%
infection_attempt                     1035     6ms 33us 91ns      2.28%
sample_setting                        1035     3ms 66us 52ns      1.16%
get_contact                           1035   1ms 135us 202ns      0.43%
schedule_next_forecasted_infection    1286  22ms 329us 102ns      8.44%
Total Measured                        1385  23ms 897us 146ns      9.03%

Event Label                     Count  Rate (per sec)
-----------------------------------------------------
property progression               36          136.05
recovery                           27          102.04
accepted infection attempt      1,035        3,911.50
forecasted infection            1,286        4,860.09

Infection Forecasting Efficiency: 80.48%
Basic usage
Count an event:
use ixa::profiling::increment_named_count;

increment_named_count("forecasted infection");
increment_named_count("accepted infection attempt");
Time an operation:
use ixa::profiling::{close_span, open_span};

let span = open_span("forecast loop");
// operation code here (algorithm, function call, etc.)
close_span(span); // optional; dropping the span also closes it
Spans also auto-close at end of scope (RAII), which is useful for early returns:
use ixa::profiling::open_span;

fn complicated_function() {
    let _span = open_span("complicated function");
    // Complicated control flow here, maybe with lots of `return` points.
} // `_span` goes out of scope, automatically closed.
Printing results to the console (after the simulation completes):
use ixa::profiling::print_profiling_data;

print_profiling_data();
This prints spans, counts, and any computed statistics. You can also call
print_named_spans(), print_named_counts(), and print_computed_statistics()
individually.
Minimal example
use ixa::prelude::*;
use ixa::profiling::*;

fn main() {
    let mut context = Context::new();

    context.add_plan(0.0, |context| {
        increment_named_count("my_model:event");
        {
            let _span = open_span("my_model:expensive_step");
            // ... do work ...
        } // span auto-closes on drop

        context.shutdown();
    });

    context.execute();

    // Console output (spans, counts, computed statistics).
    print_profiling_data();

    // Writes JSON to: <output_dir>/<file_prefix>profiling.json
    // using the same report options configuration as CSV reports.
    context.write_profiling_data();
}
See examples/profiling in the repository for a more complete example,
including configuring report_options() to control the output directory, file
prefix, and overwrite behavior.
Writing JSON output
ProfilingContextExt::write_profiling_data() writes a pretty JSON file to:
<output_dir>/<file_prefix>profiling.json
using the same report_options() configuration as CSV reports (directory, file
prefix, overwrite). The JSON includes:
date_timeexecution_statisticsnamed_countsnamed_spanscomputed_statistics
Example:
use std::path::PathBuf;

use ixa::prelude::*;
use ixa::profiling::ProfilingContextExt;

fn main() {
    let mut context = Context::new();

    context
        .report_options()
        .directory(PathBuf::from("./output"))
        .file_prefix("run_")
        .overwrite(true);

    // ... run the simulation ...
    context.execute();

    context.write_profiling_data();
}
Special names and coverage
Spans may overlap or nest. The sum of all individual span durations will not
generally equal total runtime. A special span named “Total Measured” is open
if and only if any other span is open; it tracks how much runtime is covered by
some span.
Computed statistics
You can register custom, derived metrics over collected ProfilingData using
add_computed_statistic(label, description, computer, printer). The “computer”
returns an Option<T> (for conditionally defined statistics), and the “printer”
prints the computed value.
Computed statistics are printed by print_computed_statistics() and included in
the JSON under computed_statistics (label, description, value).
The supported computed value types are usize, i64, and f64.
API (simplified):
pub type CustomStatisticComputer<T> = Box<dyn (Fn(&ProfilingData) -> Option<T>) + Send + Sync>;
pub type CustomStatisticPrinter<T> = Box<dyn Fn(T) + Send + Sync>;

pub fn add_computed_statistic<T: ComputableType>(
    label: &'static str,
    description: &'static str,
    computer: CustomStatisticComputer<T>,
    printer: CustomStatisticPrinter<T>,
);
Example:
use ixa::profiling::{add_computed_statistic, increment_named_count};

increment_named_count("my_model:event");
increment_named_count("my_model:event");

add_computed_statistic::<usize>(
    "my_model:event_count",
    "Total example events",
    Box::new(|data| data.counts.get("my_model:event").copied()),
    Box::new(|value| println!("Computed my_model:event_count = {value}")),
);
Random Module
Challenges of randomness
Random sampling is a fundamental capability for most simulations. The requirement that experiments also need to be deterministic makes randomness a subtle issue.
randomness vs. determinism
A truly random number source produces numbers in a sequence that cannot be predicted even in principle. A pseudorandom number source produces numbers in a sequence according to a completely deterministic algorithm, so if you know the algorithm, you can predict the next number in the sequence exactly. However, good pseudorandom number generators can produce sequences that appear indistinguishable from a truly random sequence according to a battery of rigorous statistical tests. We sometimes use the word random when we actually mean pseudorandom. Because we want simulations to be reproducible, we want them to be deterministic. But we also want statistical randomness within the simulation. Pseudorandom number generators give us both determinism and statistical randomness.
Here are the primary ways we handle this challenge in Ixa:
- We use pseudorandom number generators (PRNG or just RNG for short), which when provided with a seed number will produce numbers in a statistically random sequence—except that using the same seed will produce the same random sequence. To run a “new” simulation, provide a different seed.
- The default hash function used in the Rust Standard Library for containers
like
std::collections::HashMapandstd::collections::HashSetis nondeterministic for technical reasons that don’t apply to our application. Therefore, we provideixa::HashMapandixa::HashSet, which use a deterministic—and much faster—hash function. - Each module defines its own random number sources, so the use of RNGs in one module is somewhat isolated from RNGs used in other modules. Of course, if a module interacts with other parts of Ixa, its own random behavior can “leak” and affect the determinism of other modules as well.
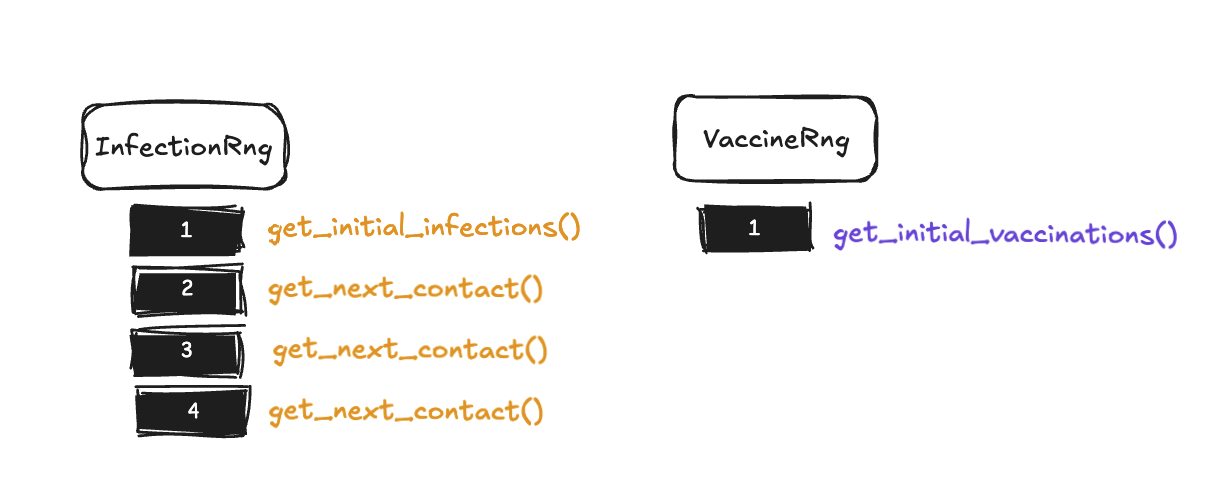
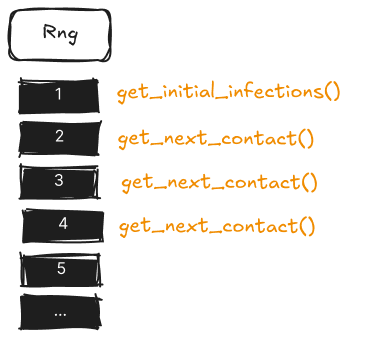 Using distinct RNGs in distinct components helps maintain simulation
reproducibility and prevents unintended interactions between independent parts
of your model. When modules share RNG streams, adding a new random call in one
component can shift the entire sequence of random numbers consumed by other
components, making it impossible to isolate changes or compare scenarios
reliably. For example, if you’re comparing two disease transmission scenarios
where only the infection rate differs, you want the same sequence of people to
be randomly selected for potential infection in both runs - but if these
scenarios share an RNG with a recovery module that makes different numbers of
random calls due to varying infection counts, the transmission module will
consume different parts of the random sequence, compromising the comparison. By
giving each module its own RNG, you ensure that changes in one module’s random
behavior don’t cascade through the entire simulation, enabling precise scenario
comparisons and reproducible debugging.
Using distinct RNGs in distinct components helps maintain simulation
reproducibility and prevents unintended interactions between independent parts
of your model. When modules share RNG streams, adding a new random call in one
component can shift the entire sequence of random numbers consumed by other
components, making it impossible to isolate changes or compare scenarios
reliably. For example, if you’re comparing two disease transmission scenarios
where only the infection rate differs, you want the same sequence of people to
be randomly selected for potential infection in both runs - but if these
scenarios share an RNG with a recovery module that makes different numbers of
random calls due to varying infection counts, the transmission module will
consume different parts of the random sequence, compromising the comparison. By
giving each module its own RNG, you ensure that changes in one module’s random
behavior don’t cascade through the entire simulation, enabling precise scenario
comparisons and reproducible debugging.
requirements for determinism
The determinism guarantee applies to repeated execution of the same model compiled with the same version of Ixa. However, you should not expect identical results between different versions of Ixa. When you make changes to your own code, it is very easy to change the simulation behavior even if you don’t intend to. Do not be surprised if you get different results if you make changes to your own code.
How to make and use a random number source
1. Define an RNG with define_rng!
Suppose we want to make a transmission manager that randomly samples a person to
become infected. In transmission_manger.rs we define a random number source
for our exclusive use in the transmission manager using the define_rng! macro,
giving it a unique name:
define_rng!(TransmissionRng);This macro generates all the code needed to define TransmissionRng.
2. Ensure the random module is initialized
Initialization of the random module only needs to be done one time for a given
Context instance to initialize all random number sources defined anywhere in
the source. It is not an error to initialize more than once, but the random
module’s state will be reset on the second initialization.
automatically with run_with_args()
This step is automatically done for you if you use run_with_args(), which is
the recommended way to run your model. This allows you to provide a seed for the
random module as a command line parameter, among other conveniences.
manually with run_with_args()
Even if you are using run_with_args(), you might still wish to
programmatically initialize the Context with a hard-coded random seed, say,
during development.
fn main() {
    run_with_args(|context, _, _| {
        context.init_random(42);
        Ok(())
    })
    .unwrap();
}
This re-initializes the random module with the provided seed.
manually on Context
In cases such as in unit tests, you can initialize the random module manually:
let mut context = Context::new();
// Initialize with a seed for reproducibility.
context.init_random(42);
3. Sampling random numbers using the RNG
The random module endows Context with
several convenient member functions
you can use to do different kinds of sampling. (The next section covers
several.) The key is to always provide the name of the RNG we defined in step 1.
We called it TransmissionRng in our example.
let random_integer = context.sample_range(TransmissionRng, 0..100);Make sure the random module’s context extension is imported if your IDE does
not automatically add the import for you:
use ixa::prelude::*;Some typical uses of sampling
Ixa provides several methods for generating random values through the context:
Sample from a Range
let random_person = context.sample_range(MyRng, 0..POPULATION);Sample Boolean with Probability
let result = context.sample_bool(MyRng, 0.4); // 40% chance of trueSample from a Distribution
Ixa re-exports the rand crate as ixa::rand. The rand crate comes with
a few common distributions.
The rand_distr and the
statrs crates
provide many more.
let value = context.sample_distr(MyRng, Uniform::new(2.0, 10.0).unwrap());`rand` crate version compatibility
As of this writing, the latest version of the rand crate is v0.9.2, but some
popular crates in the Rust ecosystem still use rand@0.8.*, which is
incompatible. Using an incompatible version in your code can result in
confusing errors that end with the tell-tale line, “Note: there are multiple
different versions of crate rand in the dependency graph”. Always using
rand that Ixa re-exports at ixa::rand will help you avoid this trap.
Custom Random Generation
For more sophisticated sampling use cases, you might need direct access to the
random number generator. In this case, we use a design pattern that ensures we
have safe access to the RNG: we pass a closure to the context.sample(…)
method that takes the RNG as an argument. If we didn’t already have
context.sample_weighted(…), we could do the following:
let choices = ['a', 'b', 'c'];
let weights = [2,   1,   1];
let choice = context.sample(MyRng, |rng|{
    let dist = WeightedIndex::new(&weights).unwrap();
    choices[dist.sample(rng)]
});
Reports In Depth
Syntax Summary and Best Practices
// Create a struct for a row of the report; must implement `Serialize`.
#[derive(Serialize)]
struct ReportItem {
    // Arbitrary (serializable) data fields.
}

// Define the report item in Ixa.
define_report!(ReportItem);

// Somewhere during context initialization, initialize the report:
context.add_report::<ReportItem>("my_report")?;

// To write a row to the report:
context.send_report(
     ReportItem {
         // A concrete ReportItem instance
     }
);
Best practices:
- Only record as much data as you require, because gathering and writing data takes computation time, the data itself takes up space, and post-processing also takes time.
- In particular, avoid a “snapshot the universe” approach to recording simulation state.
- Balance the amount of aggregation you do inside your simulation with the amount of aggregation you do outside of your simulation. There are trade-offs.
- Do not use the
-f/–force-overwriteflag in production to avoid data loss. - Use indexes / multi-indexes for reports that use queries. (See the chapter on Indexing.)
Introduction
Ixa reports let you record structured data from your simulation while it runs. You can capture events, monitor population states over time, and generate summaries of model behavior. The output is written to CSV files, making it easy to use external tools or existing data analysis pipelines.
The report API takes care of a lot of details so you don’t have to.
- One file per report type - Each report you define creates its own CSV file
- Automatic headers - Column names are derived from your report structure
- Hook into global configuration - Control file names, prefixes, output directories, and whether existing output files are overwritten using a configuration file or Ixa’s command line arguments
- Streaming output - Data is written incrementally during simulation execution
There is also built-in support for reports based on queries and periodic reports that record data at regular intervals of simulation time.
Configuring Report Options
You can configure the reporting system using the report_options() method on
Context. The configuration API uses the builder pattern to configure the
options for all reports for the context at once.
use ixa::prelude::*;
use std::path::PathBuf;

let mut context = Context::new();
context
    .report_options()
    .file_prefix("simulation_".to_string())
    .directory(PathBuf::from("./output"))
    .overwrite(true);
The configuration options are:
| Method | Description |
|---|---|
file_prefix(String) | A prefix added to all report filenames. Useful for distinguishing different simulation runs or scenarios. |
directory(PathBuf) | The directory where CSV files will be written. Defaults to the current working directory. |
overwrite(bool) | Whether to overwrite existing files with the same name. Defaults to false to prevent accidental data loss. |
Note that all reports defined in the Context share this configuration.
This configuration is also used by other outputs that integrate with report
options, such as the profiling JSON written by
ixa::profiling::ProfilingContextExt::write_profiling_data().
Case Study 1: A Basic Report
Let’s imagine we want a basic report that records every infectiousness status
change event (see examples/basic-infection/src/incidence_report.rs). The first
few rows might look like this:
| time | person_id | infection_status |
|---|---|---|
| 0.0 | 986 | I |
| 0.001021019741165120 | 373 | I |
| 0.013085498308028700 | 338 | I |
| 0.02134601331583040 | 542 | I |
| 0.02187737003255150 | 879 | I |
| ⋮ | ⋮ | ⋮ |
As far as Ixa’s report system is concerned, we really only need four ingredients for a simple report:
- A report item type that will represent one row of data in our report,
basically anything that implements
serde::Serialize. - A
define_report!macro invocation declaring the report item is for a report. - A call to
context.add_report(), which readies the output file for writing. This also establishes the filename associated to the report for the report item according to yourContext’s report configuration. (See the section “Configuring Report Options” for details.) - One or more calls to
context.send_report(), which write lines of data to the output file.
But even for very simple use cases like this one, we will need to “wire up” simulation events, say, to our data collection. Here is what this might look like in practice:
// initialization_report.rs
use ixa::prelude::*;
use serde::{Deserialize, Serialize};
// ...any other imports you may need.

/// 1. This struct will represent a row of data in our report.
#[derive(Serialize)]
struct IncidenceReportItem {
    /// The simulation time (in-universe time) the transition took place
    time: f64,
    /// The ID of the person whose status changed
    person_id: PersonId,
    /// The new status the person transitioned to
    infection_status: InfectionStatusValue,
}

/// 2. Tell Ixa that we want a report for `IncidenceReportItem`.
define_report!(IncidenceReportItem);

/// This and other auxiliary types would typically live in a different
/// source file in practice, but we emphasize here how we are "wiring up"
/// the call to `context.send_report()` to the change in a person property.
type InfectionStatusEvent = PersonPropertyChangeEvent<InfectionStatus>;

/// We will want to ensure our initialization function is called before
/// starting the simulation, so let's follow the standard pattern of having
/// an `init()` function for our report module, called from a main
/// initialization function somewhere.
pub fn init(context: &mut Context) -> Result<(), IxaError> {
 /// 3. Prepare the report for use. This gives the report the *short name*
 ///    `"incidence"`.
    context.add_report::<IncidenceReportItem>("incidence")?;
    /// In our example, we will record each transition of infection status
    context.subscribe_to_event::<InfectionStatusEvent>(handle_infection_status_change);
    Ok(())
}

fn handle_infection_status_change(context: &mut Context, event: InfectionStatusEvent) {
 /// 4. Writing a row to the report is as easy as calling
 ///    `context.send_report` with the data you want to record.
    context.send_report(
     IncidenceReportItem {
         time: context.get_current_time(),
         person_id: event.person_id,
         infection_status: event.current,
     }
    );
}
This report is event driven: an InfectionStatusEvent triggers the creation of
a new row in the report. But do we really want to record every change of
infection status? Suppose what we actually care about is transitions from
susceptible to infected. In that case we might modify the code as follows:
fn handle_infection_status_change(context: &mut Context, event: InfectionStatusEvent) {
    /// 4. Only write a row if a susceptible person becomes infected.
    if (InfectionStatusValue::Susceptible, InfectionStatusValue::Infected)
        == (event.previous, event.current)
    {
        context.send_report(
            IncidenceReportItem {
                time: context.get_current_time(),
                person_id: event.person_id,
                infection_status: event.current,
            }
        );
    }
}
Report Design Considerations
Separation of Concerns
Notice that we use a property change event to trigger writing to the report in
the example of the previous section. We could have done it differently: Instead
of subscribing an even handler to a property change event, we could have made
the call to context.send_report directly from whatever code changes a person
from “susceptible” to “infected”. But this is a bad idea for several reasons:
- Separation of Concerns & Modularity: The transmission manager, or whatever code is responsible for changing the property value, should not be burdened with responsibilities like reporting that are outside of its purview. Likewise, the code for the report exists in a single place and has a single responsibility.
- Maintainability: Putting the call to
context.send_reportwith the code that makes the property change implicitly assumes that that is the only way the property will be changed. But what if we modify how transmission works? We would have to remember to also update every single affected call tocontext.send_report. This explosion in complexity is exactly the problem the event system is meant to solve.
Data Aggregation
You have to decide what data to include in the report and when to collect it. To determine the data sets you need, work backwards from what kinds of analysis and visualizations you will want to produce. It is best to avoid over-printing data that will not be used downstream of the simulation process. Often the most important design question is:
How much aggregation do you do inside the model versus during post-processing after the fact?
Some of the trade-offs you should consider:
- Aggregation in Rust requires more engineering effort. You generally need to work with types and container data structures, which might be unfamiliar to programmers coming from dynamic languages like Python.
- Aggregation in Rust generally executes much faster than post-processing in Python or R.
- In the model you have access to the full context of the data, including input
parameters and person properties—all system state—at the time you are
recording the data. Consequently:
- you can do more sophisticated filtering of data;
- you can do computation or processing using the full context that might be difficult or impossible after the fact.
- Data processing in Python is easy to do and possibly a pre-existing skillset for the model author.
- Relying on post-processing might require very large datasets, possibly many gigabytes, which requires both disk space and processing time.
Case Study 2: A Report With Aggregation
In the Ixa source repository you will find the basic-infection example in the
examples/ directory. You can build and run this example with the following
command:
cargo run --example basic-infection
The incidence report implemented in
examples/basic-infection/src/incidence-report.rs is essentially the report of
the section Case Study 1: A Basic Report above, which records the current
time, PersonId, and infection status every time there is a change in a
person’s InfectionStatus property. This obviously results in 2 × 1000 =
2000 rows of data, twice the population size, since each person makes two
transitions in this model.
But suppose what we really want is to plot the count of people having each
InfectionStatusValue at the end of each day over time.

We can easily compute this data from the existing incidence report in a post-processing step. But a more efficient approach is to do the aggregation within the model so that we write only exactly the data we need.
| time | susceptible_count | infected_count | recovered_count |
|---|---|---|---|
| 0.0 | 999 | 1 | 0 |
| 1.0 | 895 | 92 | 13 |
| 2.0 | 811 | 157 | 32 |
| 3.0 | 737 | 193 | 70 |
| 4.0 | 661 | 226 | 113 |
| ⋮ | ⋮ | ⋮ | ⋮ |
The MAX_TIME is set to 300 for this model, so this will result in only 301
rows of data (counting “day 0”).
Aggregation
We could count how many people are in each category every time we write a row to the report, but it is much faster and more efficient to just keep track of the counts. We use a data plugin for this purpose:
struct AggregateSIRDataContainer {
    susceptible_count: usize,
    infected_count: usize,
    recovered_count: usize,
}

define_data_plugin!(AggregateSIRData, AggregateSIRDataContainer,
    AggregateSIRDataContainer {
        susceptible_count: 0,
        infected_count: 0,
        recovered_count: 0,
    }
);
We need to initialize the susceptible_count in an init function:
pub fn init(context: &mut Context) {
    // Initialize `susceptible_count` with population size.
    let susceptible = context.get_current_population();
    let container = context.get_data_mut(AggregateSIRData);
    container.susceptible_count = susceptible;
   // ...
}
And we need to update these counts whenever a person transitions from one category to another:
fn handle_infection_status_change(context: &mut Context, event: InfectionStatusEvent) {
    match (event.previous, event.current) {
        (InfectionStatusValue::S, InfectionStatusValue::I) => {
            // A person moved from susceptible to infected.
            let container = context.get_data_mut(AggregateSIRData);
            container.susceptible_count -= 1;
            container.infected_count += 1;
        }
        (InfectionStatusValue::I, InfectionStatusValue::R) => {
            // A person moved from infected to recovered.
            let container = context.get_data_mut(AggregateSIRData);
            container.infected_count -= 1;
            container.recovered_count += 1;
        }
        (_, _) => {
            // No other transitions are possible.
            unreachable!("Unexpected infection status change.");
        }
    }
}
We need to wire up this event handler to the InfectionStatusEvent in the
init function:
pub fn init(context: &mut Context) {
    // Initialize `susceptible_count` with population size....

    // Wire up the `InfectionStatusEvent` to the handler.
    context.subscribe_to_event::<InfectionStatusEvent>(handle_infection_status_change);
    // ...
}
That is everything needed for the bookkeeping.
aggregation inside the model
The aggregation step often doesn’t look like aggregation inside the model, because we can accumulate values as events occur instead of aggregating values after the fact.
Reporting
Now we tackle the reporting. We need a struct to represent a row of data:
// The report item, one row of data.
#[derive(Serialize)]
struct AggregateSIRReportItem {
    time: f64,
    susceptible_count: usize,
    infected_count: usize,
    recovered_count: usize,
}
// Tell Ixa it is a report item.
define_report!(AggregateSIRReportItem);
Now we initialize the report with the context, and we add a periodic plan to
write to the report at the end of every day. The complete init() function is:
pub fn init(context: &mut Context) {
    // Initialize `susceptible_count` with population size.
    let susceptible = context.get_current_population();
    let container = context.get_data_mut(AggregateSIRData);
    container.susceptible_count = susceptible;

    // Wire up the `InfectionStatusEvent` to the handler.
    context.subscribe_to_event::<InfectionStatusEvent>(handle_infection_status_change);

    // Initialize the report.
    context.add_report::<AggregateSIRReportItem>("aggregate_sir_report")
        .expect("Failed to add report");

    // Write data to the report every simulated day.
    context.add_periodic_plan_with_phase(
        1.0, // A period of 1 day
        write_aggregate_sir_report_item,
        ExecutionPhase::Last // Execute the plan at the end of the simulated day.
    );
}
The implementation of write_aggregate_sir_report_item is straightforward: We
fetch the values from the data plugin, construct an instance of
AggregateSIRReportItem, and “send” it to the report.
fn write_aggregate_sir_report_item(context: &mut Context) {
    let time = context.get_current_time();
    let container = context.get_data_mut(AggregateSIRData);

    let report_item = AggregateSIRReportItem {
        time,
        susceptible_count: container.susceptible_count,
        infected_count: container.infected_count,
        recovered_count: container.recovered_count,
    };
    context.send_report(report_item);
}
Exercise:
- The
aggregate_sir_reportis 301 lines long, one row every day untilMAX_TIME=300, but most of the rows are of the form#, 0, 0, 1000, because the entire population is recovered long before we reachMAX_TIME. This is pretty typical of periodic reports—you get a lot of data you don’t need at the end of the simulation. Add a simple filter towrite_aggregate_sir_report_itemso that theaggregate_sir_reportonly contains the data we actually want, about ~90 rows (the first ~90 days). Don’t just filter on the day, because the “last” day can change with a different random seed or changes to the model.
Examples
The following examples are included in the examples/ directory:
Feature Demos
basic
A minimal example that creates a Context, schedules a single plan, and prints
the current simulation time. Good starting point for understanding the basic
structure of an Ixa model.
cargo run --example basic
parameter-loading
Demonstrates how to load simulation parameters from a JSON file using
load_parameters_from_json and store them as global properties.
cargo run --example parameter-loading
profiling
Demonstrates the profiling module: counting events, opening spans, computing statistics, and writing profiling data to JSON.
cargo run --example profiling --features profiling
End-to-end Examples
basic-infection
A simple SIR model with a constant force of infection applied to a homogeneous population. Demonstrates entity definitions, property changes, event observation, and report writing.
cargo run --example basic-infection
births-deaths
Extends the basic infection model with birth and death processes, age groups, and age-varying force of infection. Demonstrates dynamic population changes, plan cancellation on death, and person property lookups.
cargo run --example births-deaths
network-hhmodel
A network module (using Ixa’s network extentension) which loads a population
with household structure from CSV files and spreads infection along network edges
with different transmission rates by edge type.
cargo run --example network-hhmodel
External examples
Migration to Ixa 2.0
Properties in the new Entity system
In the new Entity system, properties work a little differently. We now have a chapter devoted to properties in the Ixa Book. This section of the migration guide describes the changes in the new system relative to the old system.
The Old Way to Define a Property
Previously a property consisted of two distinct types: the type of the property’s value, and the type that identifies the property itself.
// The property _value_ type, any regular Rust datatype that implements
// `Copy` and a few other traits, which we define like any other Rust type.
#[derive(Debug, Hash, Eq, PartialEq, Clone, Copy, Serialize, Deserialize)]
pub enum InfectionStatusValue {
    Susceptible,
    Infected,
    Recovered,
}

// The type identifying the property itself. A macro defines this as a ZST and
// generates the code connecting it to the property value type above.
define_person_property_with_default!(
    InfectionStatus,      // Property Name
    InfectionStatusValue, // Type of the Property Values
    InfectionStatusValue::Susceptible // Default value used when a person is added to the simulation
);
The only entity in the old system is a person, so there’s no need to specify
that this is a property for the Person entity.
The New Way to Define a Property
In the new system, we combine these two types into a single type:
// We now have an `Entity` defined somewhere.
define_entity!(Person);
// This macro takes the entire type declaration itself as the first argument.
define_property!(
    enum InfectionStatus {
        Susceptible,
        Infected,
        Recovered,
    },
    Person,
    default_const = InfectionStatus::Susceptible
);
If you want to use an existing type for a property, or if you want to make the
same type a property of more than one Entity, you can use the impl_property!
variant:
// The downside is, we have to make sure the property type implements all the
// traits a property needs.
#[derive(Copy, Clone, Debug, PartialEq, Eq, Hash, Serialize)]
pub enum InfectionStatus {
    Susceptible,
    Infected,
    Recovered,
}

// Implements `Property<Person>` for an existing type.
impl_property!(
    InfectionStatus,
    Person,
    default_const = InfectionStatus::Susceptible
);
In the ordinary derive path, define_property! tacks on the derive traits and
pub visibility to the type definition and then calls impl_property! as
above. For property types that cannot derive PartialEq / Eq or Hash,
define_property! can also generate those implementations with
impl_eq_hash = …; manually declared types can use impl_property_eq!,
impl_property_hash!, or impl_property_eq_hash! for the same generated
behavior, or client code can implement these traits itself.
The crucial thing to understand is that the value type is the property type.
The impl Property<Person> for InfectionStatus, which the macros give you, is
the thing that ties the InfectionStatus type to the Person entity.
For details about defining properties, see the property_impl module-level docs
and API docs for the macros define_property!, impl_property!,
impl_property_eq!, impl_property_hash!, impl_property_eq_hash!,
define_derived_property!, impl_derived_property!, and define_multi_property!.
The API docs give multiple examples.
Multi-property definitions now take the entity first and the component properties as a tuple:
define_multi_property!(Person, (Age, InfectionStatus));Replace the old tuple-first form
define_multi_property!((Age, InfectionStatus), Person) and the old flat form
define_multi_property!(Person, Age, InfectionStatus) with the new form above.
Multi-properties still require at least two component properties.
Summary
| Concept | Old System | New System | Notes / Implications |
|---|---|---|---|
| Property Type Structure | Two separate types: (1) value type, and (2) property-identifier ZST. | A single type represents both the value and identifies the property. | Simplified to a single type |
| Defining Properties | Define a normal Rust type (or use an existing primitive, e.g. u8), then use a macro to define the identifying property type. | Define a normal Rust type, then use impl_property to declare it a Property<E> for a particular Entity E. | |
| Entity Association | Implicit—only one entity (“person”) | Every property must explicitly specify the Entity it belongs to (e.g., Person); Entities are defined separately. | |
| Default Values | Provided in the macro creating the property-identifier type. | Same but with updated syntax; default values are per Property<E> implementation. | |
| Using Existing Types | A single value type can be used in multiple properties—including primitive types like u8 | Only one property per type (per Entity); primitive types must be wrapped in a newtype. | Both systems require that the existing type implement the required property traits. |
| Macro Behavior | Macros define the property’s ZST and connect it to the value type via trait impls. | Macros define “is a property of entity E” relationship via trait impl. No additional synthesized types. | Both enforce correctness via macro |
Global property validator errors
Global-property validators are client code, so they should return
Result<(), Box<dyn std::error::Error + ’static>> instead of constructing
IxaError values directly. Ixa wraps any returned validator error in
IxaError::IllegalGlobalPropertyValue when a global property is set or loaded.
New Entities API: How Do I…?
We will use Person as an example entity, but there is nothing special about
Person. We could just as easily define a School entity, or an Animal
entity.
Defining a new Entity
Use the ixa::define_entity! macro:
define_entity!(Person);This both declares the type Person and implements the Entity trait for it.
If you want to implement the Entity trait for a type you have already
declared, use the impl_entity! macro instead:
#[derive(Default, Debug, PartialEq, Eq, Clone, Copy)]
pub struct Person;
impl_entity!(Person);
These macros automatically create a type alias of the form
MyEntityId = EntityId<MyEntity>. In our case, it defines the type alias
PersonId = EntityId<Person>.
Adding a new entity (e.g. a new person)
Adding a new entity with only default property values by passing the entity type directly:
let person_id = context.add_entity(Person).unwrap();(This example assumes there are no required properties, that is, that every property has a default value.)
Adding a new entity with property values using the with! macro:
let person_id = context.add_entity(with!(Person, Age(25), InfectionStatus::Infected)).unwrap();The with! macro takes the entity type as its first argument, followed by any
property values. The properties must be distinct, of course, and there must be
a value for every “required” property, that is, for every (non-derived)
property that doesn’t have a default value.
Public entity initialization no longer accepts naked tuples such as
(Age(25), InfectionStatus::Infected). Use with!(Person, …) when you want
to provide one or more property values.
Adding a new entity with just one property value:
let person_id = context.add_entity(with!(Person, Age(25))).unwrap();To initialize an entity with only default values, pass the entity type directly:
let person_id = context.add_entity(Person).unwrap();The same pattern applies to queries. Use with!(Person, …) to filter by property values, or use Person when you
want to work with the entire population. Public query APIs no longer accept naked tuples such as (Age(25),).
Getting a property value for an entity
// The compiler knows which property to fetch because of the type of the return value we have specified.
let age: Age = context.get_property(person_id);
In the rare situation in where the compiler cannot infer which property to fetch, you can specify the property explicitly using the turbo fish syntax. We recommend you always write your code in such a way that you can use the first version.
let age = context.get_property::<Person, Age>(person_id);Setting a property value for an entity
// The compiler is always able to infer which entity and property using the `EntityId` and type
// of the property value.
context.set_property(person_id, Age(35));
Index a property
// This method is called with the turbo-fish syntax, because there is no way for the compiler to infer
// the entity and property types.
context.index_property::<Person, Age>();
It is not an error to call this method multiple times for the same property. All calls after the first one will just be ignored.
Subscribe to events
The only difference is that now we use the
PropertyChangeEvent<E: Entity, P: Property<E>> and
EntityCreatedEvent<E: Entity> types.
pub fn init(context: &mut Context) {
    context.subscribe_to_event(
        move |context, event: PropertyChangeEvent<Person, InfectionStatus>| {
            handle_infection_status_change(context, event);
        },
    );

    context.subscribe_to_event(move |context, event: PropertyChangeEvent<Person, Alive>| {
        handle_person_removal(context, event);
    });
}
Appendix: Rust
- Specifying Generic Types and the Turbo Fish
- Rust Learning Resources: The parts of Rust most critical for using Ixa
- Python vs. Rust: A Python/Rust Rosetta Stone
Specifying Generic Types and the Turbo Fish
Rust and Ixa in particular make heavy use of type generics, a way of writing a single piece of code, a function for example, for a whole family of types at once. A nice feature of Rust is that the compiler can often infer the generic types at the point the function is used instead of relying on the programmer to specify the types explicitly.
Examples
The compiler’s ability to infer the types of generic functions means that for most of the common functions the types do not need to be specified with turbo fish notation:
// The compiler "magically" knows to use the `get_property` method that fetches
// `InfectionStatus` because of the type of the variable being assigned to.
let status: InfectionStatus = context.get_property(person_id);
// Explicit types are almost never required for `Context::set_property`, because
// the types of the entity ID and property value are almost always already known.
context.set_property(other_person_id, status);
The generic types for querying, sampling, and entity initialization can usually be inferred by the compiler:
// A silly example, but no turbo fish is required.
context.with_query_results(
    with!(Person, Age(30), Alive(true)),
    |people_set| println("{:?}", people_set)
);

let person_id = context
    .add_entity(with!(Person, Age(30), Alive(true)))
    .unwrap();

let population = context.query_entity_count(Person);
A few methods always require the user to specify the generic type when they are called:
// Which entity are we counting? Here the return type is always `usize`.
let population: usize = context.get_entity_count::<Person>();
// Specify which property of which entity you'd like to index.
context.index_property::<Person, Age>();
// Specify the report to add.
context.add_report::<IncidenceReportItem>("incidence")?;
// Specify the event to subscribe to.
context.subscribe_to_event::<InfectionStatusEvent>(handle_infection_status_change);
In the last example above, the concrete type we specify is actually a type alias:
pub type InfectionStatusEvent = PropertyChangeEvent<Person, InfectionStatus>;While it is not strictly necessary to define this type alias, you can see that the notation gets rather gnarly without it:
context.subscribe_to_event::<PropertyChangeEvent<Person, InfectionStatus>>(handle_infection_status_change);Learning Rust for Ixa
Why Rust?
We designed Ixa to be efficient for computers and for people. Rust provides the speed and memory characteristics necessary for large-scale, computationally-intensive simulations while still being relatively friendly to work with. That being said, if you are used to working in a higher-level language like R or Python, Rust can take some time to learn. We recommend taking a look at the The Rust Book for a comprehensive overview. Here are a few features that might be new to you:
-
Rust has a strict model of how it uses your computer memory, called ownership. In practice, this means that you can only manipulate objects in specific ways. This helps code actually do what you think it is doing and has been shown to reduce long-term bugs. Rust’s ownership rules are enforced at compile-time, which helps you find errors in your code earlier. When developing ABMs with Ixa, these capabilities help us more easily reason about complicated model logic and ensure that plugins interact modularly.
-
Rust has a cohesive ecosystem of all the tools you will need for development: it has a built-in package/project manager (
cargo), a built-in linter (clippy), a built-in environment manager for updating Rust versions so that you can manage multiple simultaneously (rustup), and a global repository for all packages. Rust provides a complete ecosystem for all your model development needs, and we find this centralization useful for ensuring robust version control and reproducibility of code across different users and computers. This also means that chances are someone has built a crate for a problem you may be troubleshooting. -
Rust is a strongly-typed language, meaning that the type of each variable must be known at compile-time and cannot be changed after variable definition. However, Rust also has automatic type inference and other ergonomic features to help make writing code more seamless and efficient. As a result, you only need to specify the type of a variable in cases where it is ambiguous while still taking advantage of the rigidity of static typing to ensure your code is doing what you think it is doing. We find the combination of static typing with other Rust features for quick prototyping valuable for writing models and tests simultaneously.
Common Rust patterns in Ixa modeling
The Rust Book remains the best resource to learn Rust, and we recommend reading the book in its entirety. However, the book emphasizes concepts that are less prevalent in day-to-day Ixa use (for instance, ownership), and certain patterns that pop up a lot are less emphasized. Below, we include sections of the book that are particularly important.
-
Chapter 5: Structs: If you are new to object-oriented programming, this chapter introduces the “object-oriented”-ness of Rust. Rust has elements of both an object-oriented and functional programming language, but structs come up often when writing an Ixa model, and thinking about Ixa as being an object-oriented framework is useful for evaluating the kinds of data you need in your model and how to use the data.
-
Chapter 6: Enums: Enums, match statements, and storing data in enum variants are all distinctly Rust patterns. If you have previously worked with Haskell or OCaml, these objects may be familiar to you. Nevertheless, enums come up frequently in Ixa, in particular with person properties (e.g., a person’s infection status is a value of an enum with variants
Susceptible,Infected,Recovered), and seeing how you can store information in each of these variants helps modelers understand how to best store the data they need for their particular use case. -
Chapter 10, Section 2: Traits: If you read only one section, let this be it. Traits are the cornerstone of Ixa’s modular nature. They are used in at least two ways throughout the Ixa codebase. First, the methods that make up higher-level abstractions – like
PropertyorEvent– are organized into traits, giving them shared features so that calling code can use these methods without knowing the exact underlying type. For instance, your model might define a trait to specify interventions that impact the probability of transmission – like facemasks or hazmat suits. Regardless of the exact nature of the intervention, your model wants to call some methods on the transmisison modifier, like returning its efficacy. If these methods are grouped into theTransmissionModifiertrait, they can be implemented on any type and used wherever the code needs a transmission modifier without depending on the underlying type. Secondly, traits implemented onContext(called “Context extensions” in Ixa) are the primary way of new modules adding a public interface so that their methods can be called from other modules. For instance, theContextPeopleExttrait extension provides methods relating to people and their properties. Rust traits are a supercharged version of “interfaces” in other programming languages, and thinking in terms of traits will help you write modular Ixa code. -
Chapter 13, Section 1: Closures: Ixa often requires the user to specify a function that gets executed in the future. This chapter goes over the mechanics for how anonymous functions are specified in Rust. Although the syntax is not challenging, this chapter discusses capturing and moving values into a closure, type inference for closure arguments, and other concepts specific to Rust closures. You may see the word “callback” referred to in the Ixa documentation – callbacks are what Ixa calls the user-specified closures that are evaluated when executing plans or handling events.
In addition,
Chapter 19: Patterns
reiterates the power of enum variants and the match statement in Rust. If you
find yourself writing more advanced Rust code, Chapters
9: Error Handling,
18: Object-oriented programming,
and
20: Advanced Features
include helpful tips as you dive into more complicated Ixa development.
If you find yourself writing more analysis-focused code in Rust, Chapters 9: Error Handling and 13.2: Iterators include helpful tools for writing code reminiscent of Python.
On Ownership
Rust’s signature feature is its ownership rules. We tried to design Ixa to handle ownership internally, so that users rarely have to think about the specific Rust rules when interfacing with Ixa. Nevertheless, understanding ownership rules is valuable for debugging more complicated Ixa code and understanding what you can and cannot do in Rust. There are excellent resources for learning Rust’s ownership rules available online, but at a high-level, here are the key ideas to understand:
- When a function takes an object as input, it takes ownership of that object
– meaning that the object is “consumed” by the function and does not exist
after the calling of that function. - This is true for all types except those
that are automatically copyable, or in Rust lingo implement the
Copytrait. All primitive types – floats, integers, booleans, etc. – implementCopy, meaning that this rule is most commonly felt with vectors and hashmaps. These are examples of types that do not implementCopy– in this case, that is because their size dynamically changes as data is added and removed, so Rust stores them in a part of the memory optimized for changing sizes rather than fast access and copying. - References (denoted by an
&in front of an object like&Object) allow functions to have access to the object without taking ownership of it. Therefore, we often return references to an object so that we do not have to give up explicit ownership of that object, such as when we want to get the value of data owned centrally by the simulation (ex., model parameters) in a particular module. - There are two kinds of references – mutable references
&mut Objectand immutable references&Object. Depending on what kind of reference you have, you can do one of two kinds of things. If you have an active immutable reference to an object, you can take any number of additional immutable references to the object. But, if you have a mutable reference to an object, you can only ever have that one mutable reference to the object be active. This is because an active immutable reference to the object would also have changed as the mutable reference is mutated, and Rust can no longer make guarantees about the memory to which the immutable reference points.
In practice, #3 often requires the most troubleshooting to get around. Sometimes, a refactor of your code can help circumvent ownership challenges.
Ixa tutorials
Within the Ixa repo, we have created some examples. Each example has a readme that walks the user through a toy model and what it illustrates about Ixa’s core functionality. To run the examples, from the repo root, just specify the name of the example:
cargo run --example {name-of-example}
In general, you will be using cargo to run and interact with your Ixa models
from the command line. We recommend learning some
basic cargo commands, and
there are valuable
cheatsheets
to keep handy as you get more involved in active development.
Here are a few other useful commands to know:
cargo testwill run all tests in the project.cargo build –releasecompiles the project into a shell executable that you can ship to your users.cargo add {crate-name}adds a Rust crate/project dependency to your project for you to use.
Additional Rust resources
- Rust By Example: “RBE shows off a bunch of code, and keeps the talking to a minimum. It also includes exercises!”
- Tour of Rust: Live code and explanations, side by side.
- Rust in Easy English: 60+ concepts, simple English, example-driven.
- Rust for the Polyglot Programmer: A guide for the experienced programmer.
- The Rust Standard Library Documentation
- The Cargo Book: An online manual for Rust’s package manager Cargo.
- The Rust Playground: Execute sample code in your browser.
Python vs. Rust
Many features of the Rust language will be familiar to Python programmers. Many examples are listed below. For more code comparisons, see py2rs.
Python
Rust
my_tuple = (1, 2, 3)
# Access the element at index 1
n = my_tuple[1]
let my_tuple = (1, 2, 3);
// Access the element at index 1
let n = my_tuple.1;(x, y, z) = my_tuple
let (x, y, z) = my_tuple;(a, _, b) = my_tuple
let (a, _, b) = my_tuple;# Lambdas are anonymous functions
f = lambda x: x * x
f(4)
// Closures are anonymous functions
let f = | x | x * x;
f(4)x: int = 42
let x: i32 = 42;range(0, 10)
0..10match x:
case 1:
...
case _:
...
match x {
    1 => { ... },
    _ => { ... }
}for i in range(0, 10):
...
for i in 0..10 {
    ...
}if x > 10:
...
else:
...
if x > 10 {
    ...
} else {
    ...
}while x < 10:
...
while x < 10 {
    ...
}import math
use std::f64::consts::PI;"Hello, {}".format(name)
format!("Hello, {}", name)lst = [1, 2, 3]
let lst = vec![1, 2, 3];